Quickstart Guide
Get two devices talking securely in under 5 minutes. This guide walks you through creating your first ZeroTier network.
New to ZeroTier? Visit zerotier.com to learn more about our global virtual networking platform.
ZeroTier Central is available in two versions. Please follow the appropriate instructions based on which version you are using:
- New Central - The modern interface with enhanced features and improved user experience (central.zerotier.com)
- Legacy Central - The original interface (my.zerotier.com)
Not sure which version you're using? See How to Check Your Central Version.
- New Central
- Legacy Central
New Central Quickstart
1. Create Your Organization
-
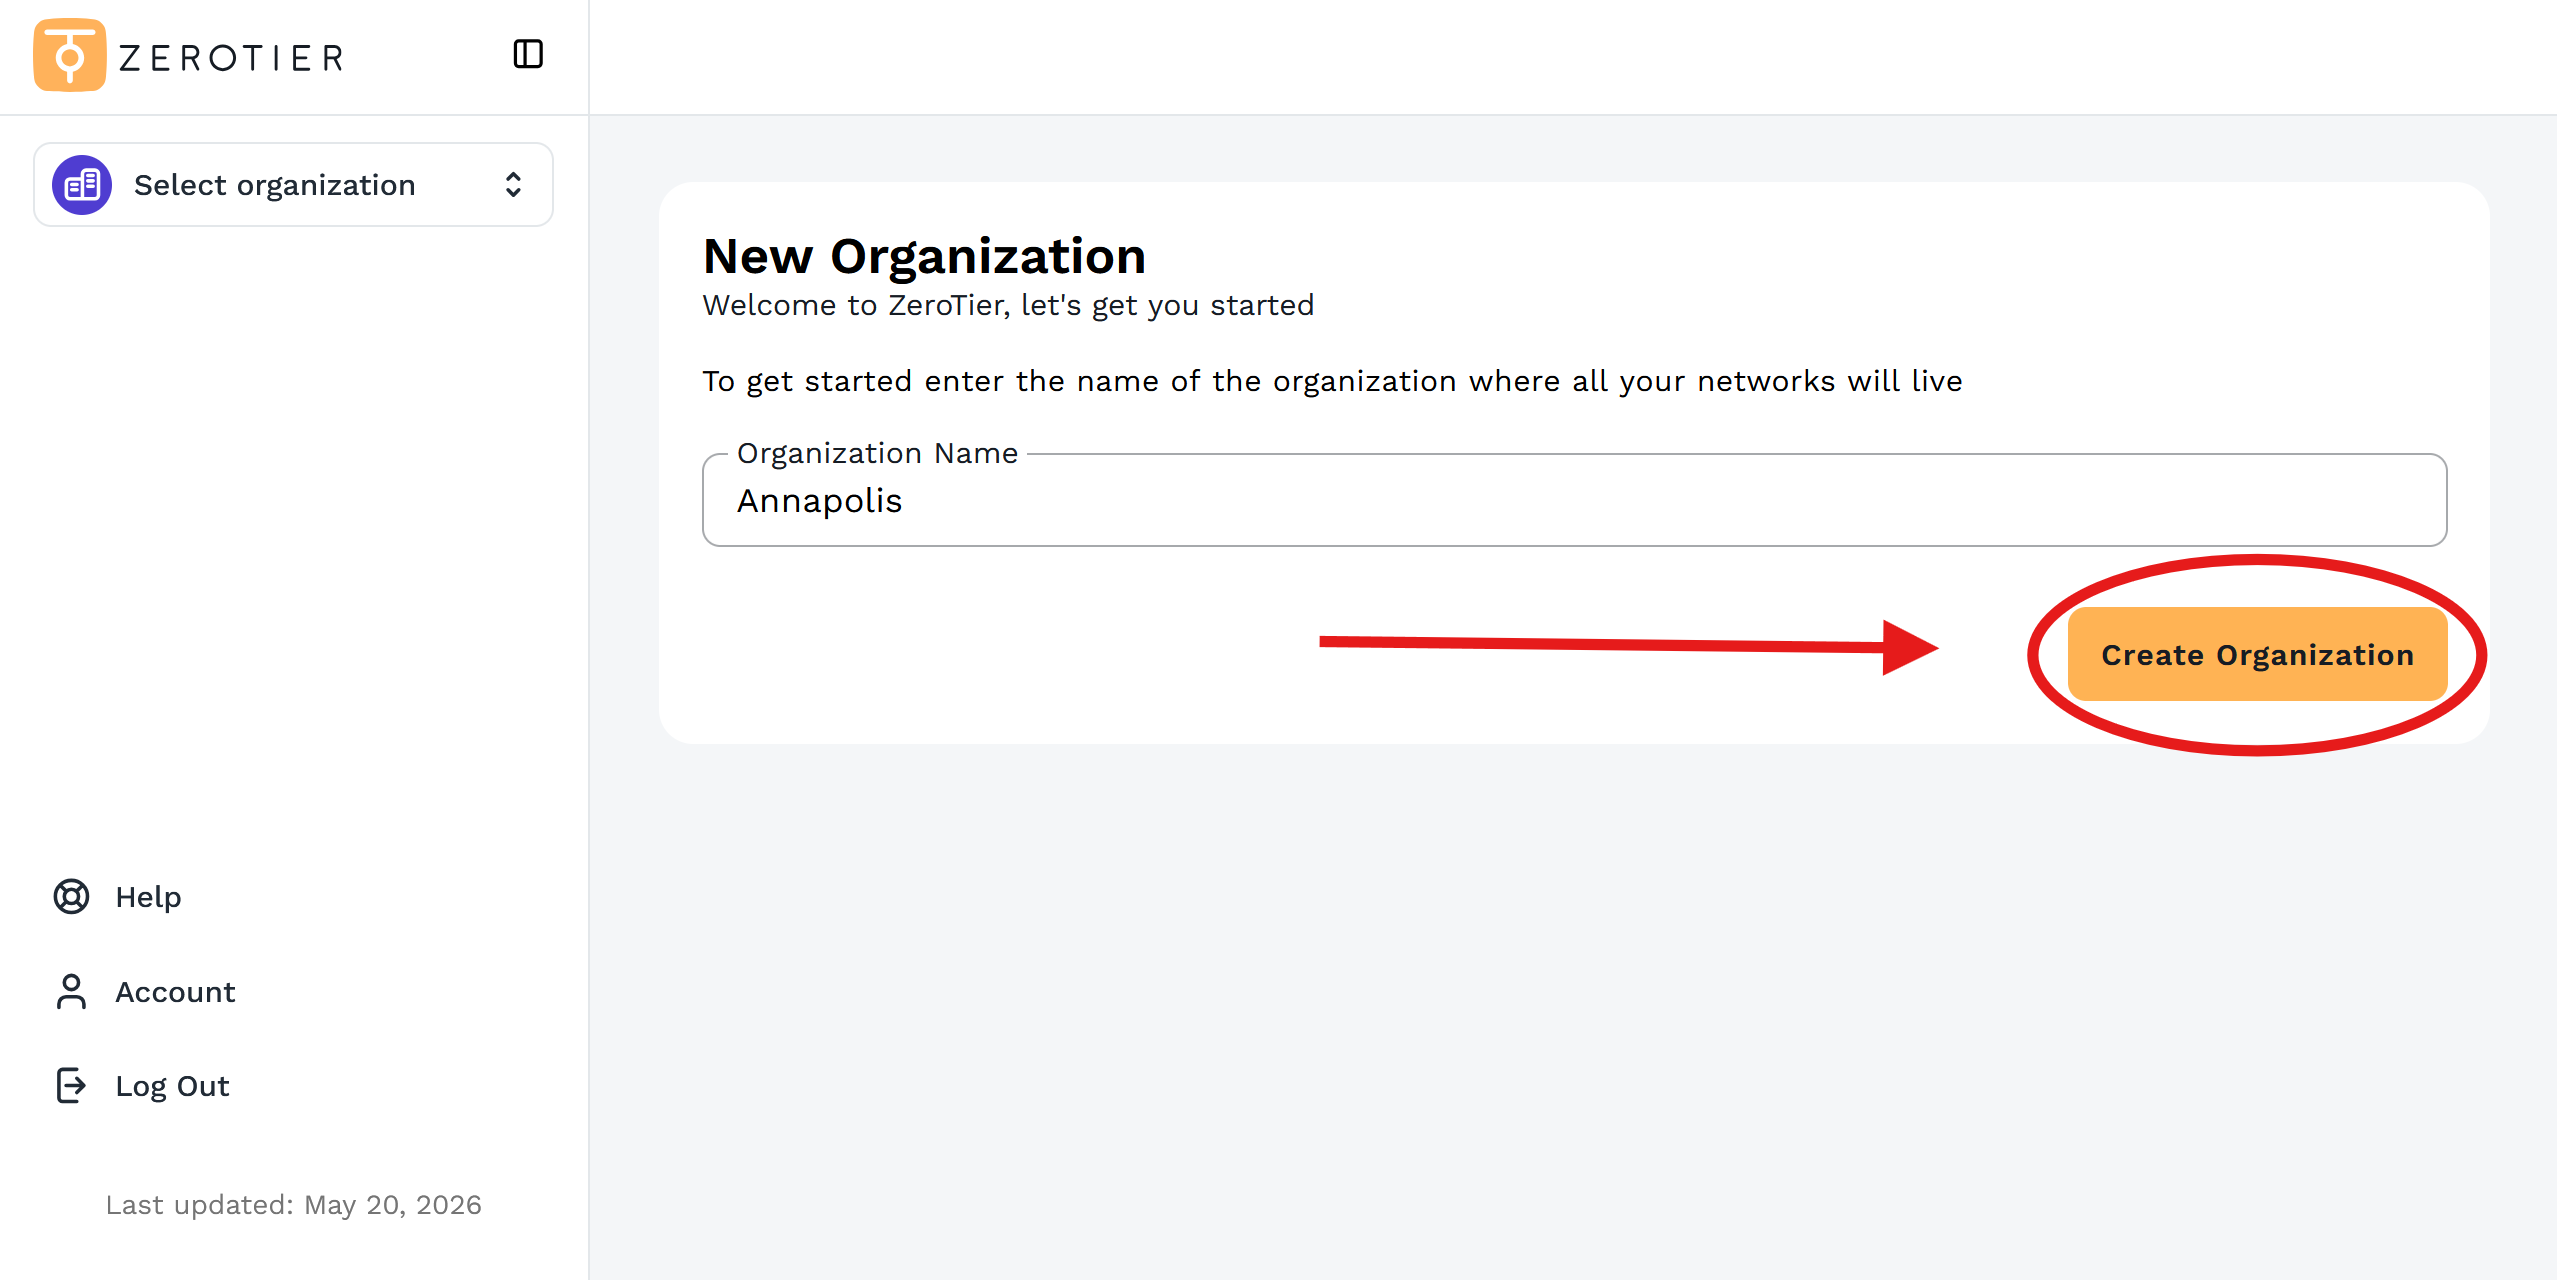
Visit central.zerotier.com and log in
-
Enter an organization name and click Create Organization
-
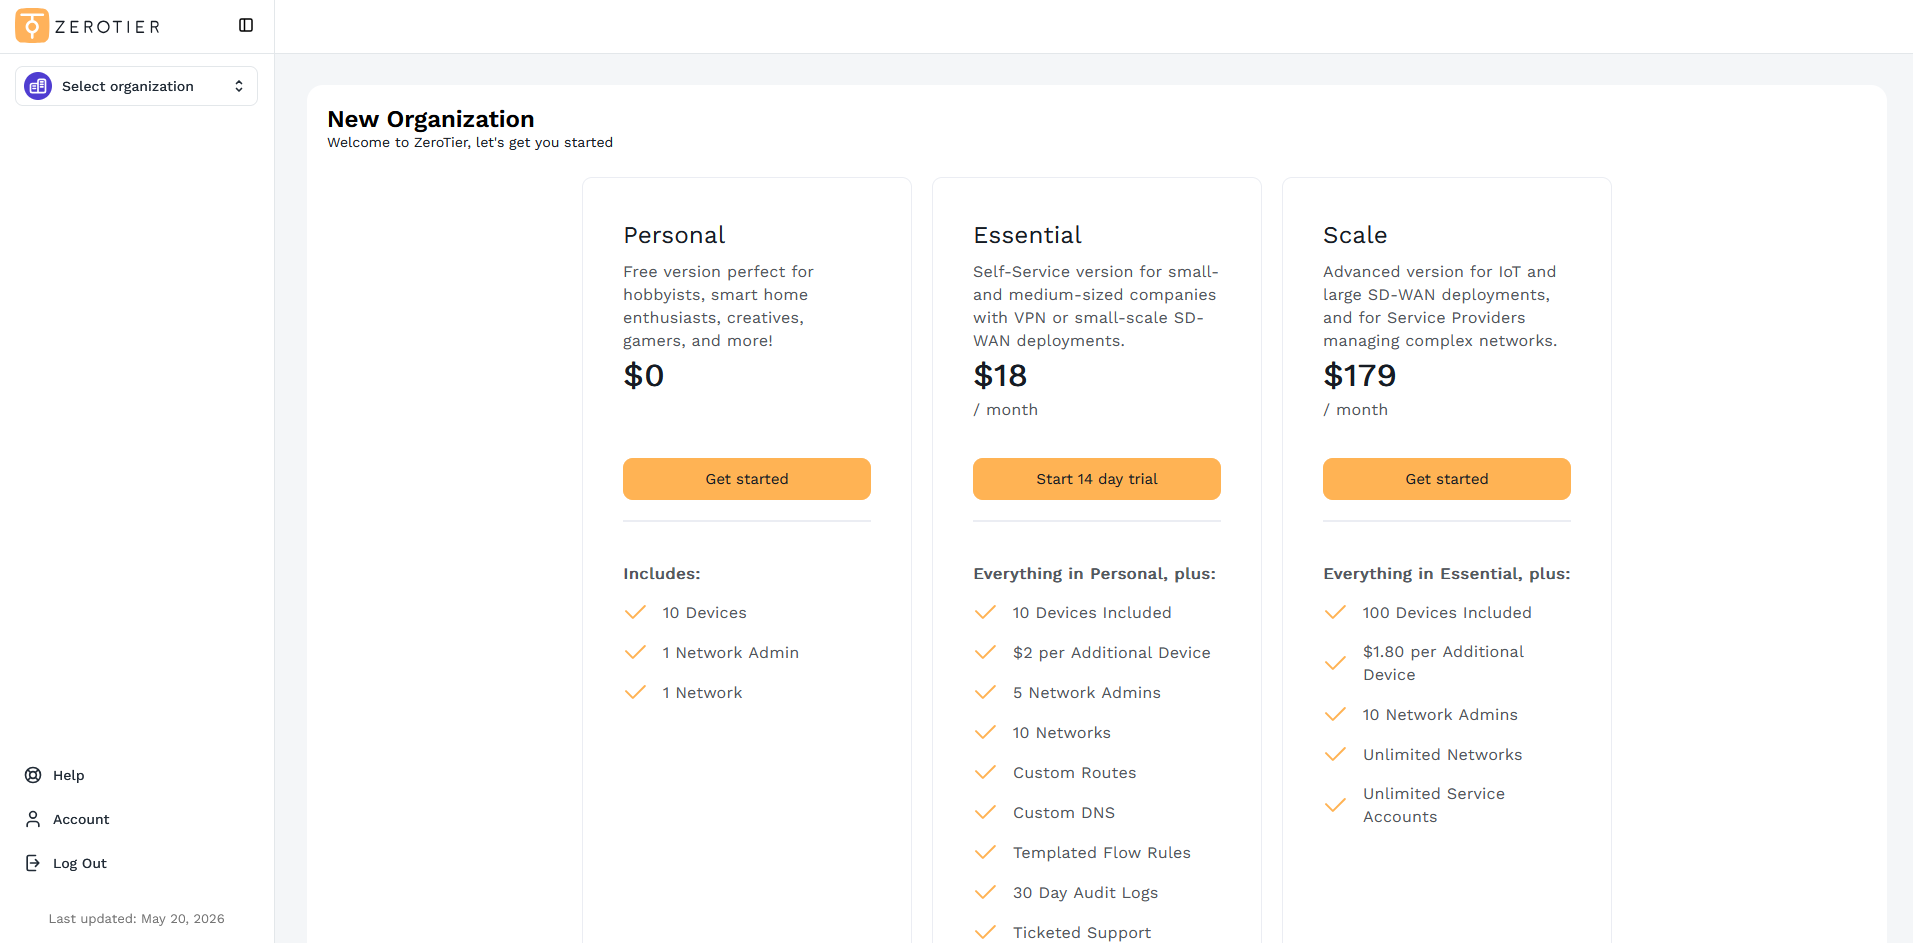
Choose a plan (your Organization comes with one Network Group and one Network by default)
2. Get Your Network ID
- In the left sidebar, expand Networks and click on your default network (e.g., my-first-network)
- Copy the Network ID from the top of the page - 16 characters like
6722f92749d059c7
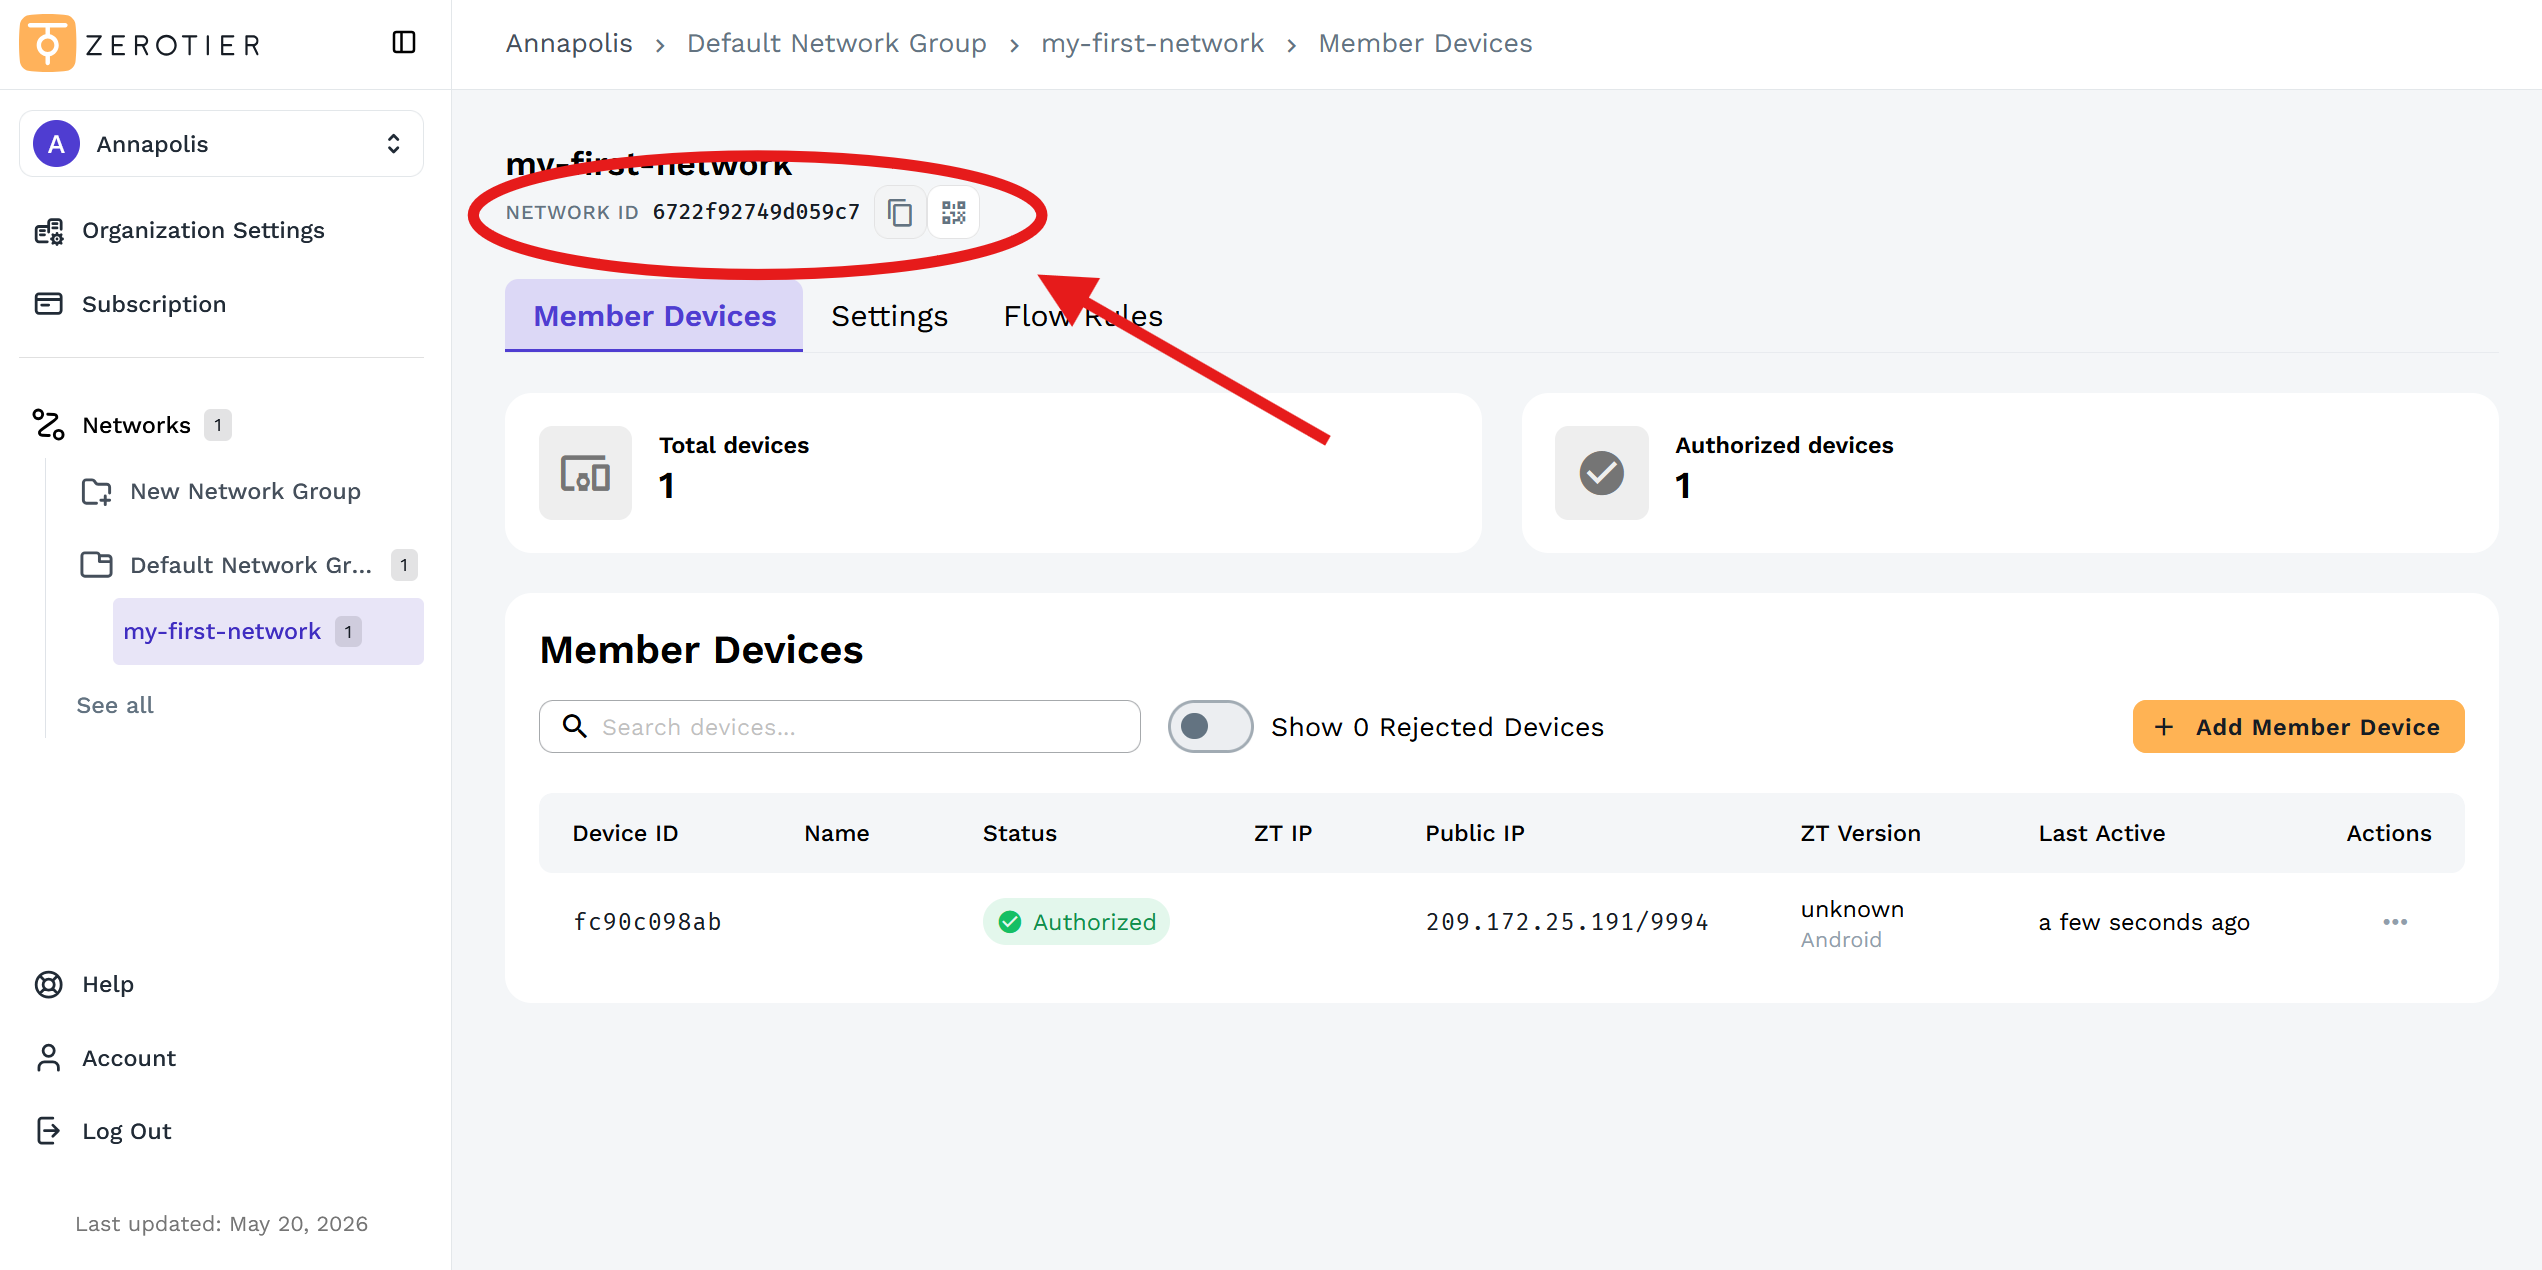
Keep this tab open for step 5.
3. Install ZeroTier
Download ZeroTier from zerotier.com/download. Install on each device you want to connect.
ZeroTier supports the current major release and two major releases prior. Currently supported versions are v1.16.x, v1.14.x, and v1.12.x.
4. Join Your Network
On PC/MacOS
- Locate the ZeroTier icon in your menu bar (MacOS) or system tray (Windows)
- Click the icon -> Join New Network...
- Paste your Network ID and click Join
Using CLI
The CLI works on any device with terminal access.
sudo zerotier-cli join NETWORK_ID
5. Authorize Your Devices
When a device joins, you have two options:
If you don't see a newly joined device, refresh the page to see the latest devices awaiting authorization.
Option 1: Respond to the notification banner
- A notification banner will appear at the top when a device joins
- Click Authorize in the banner
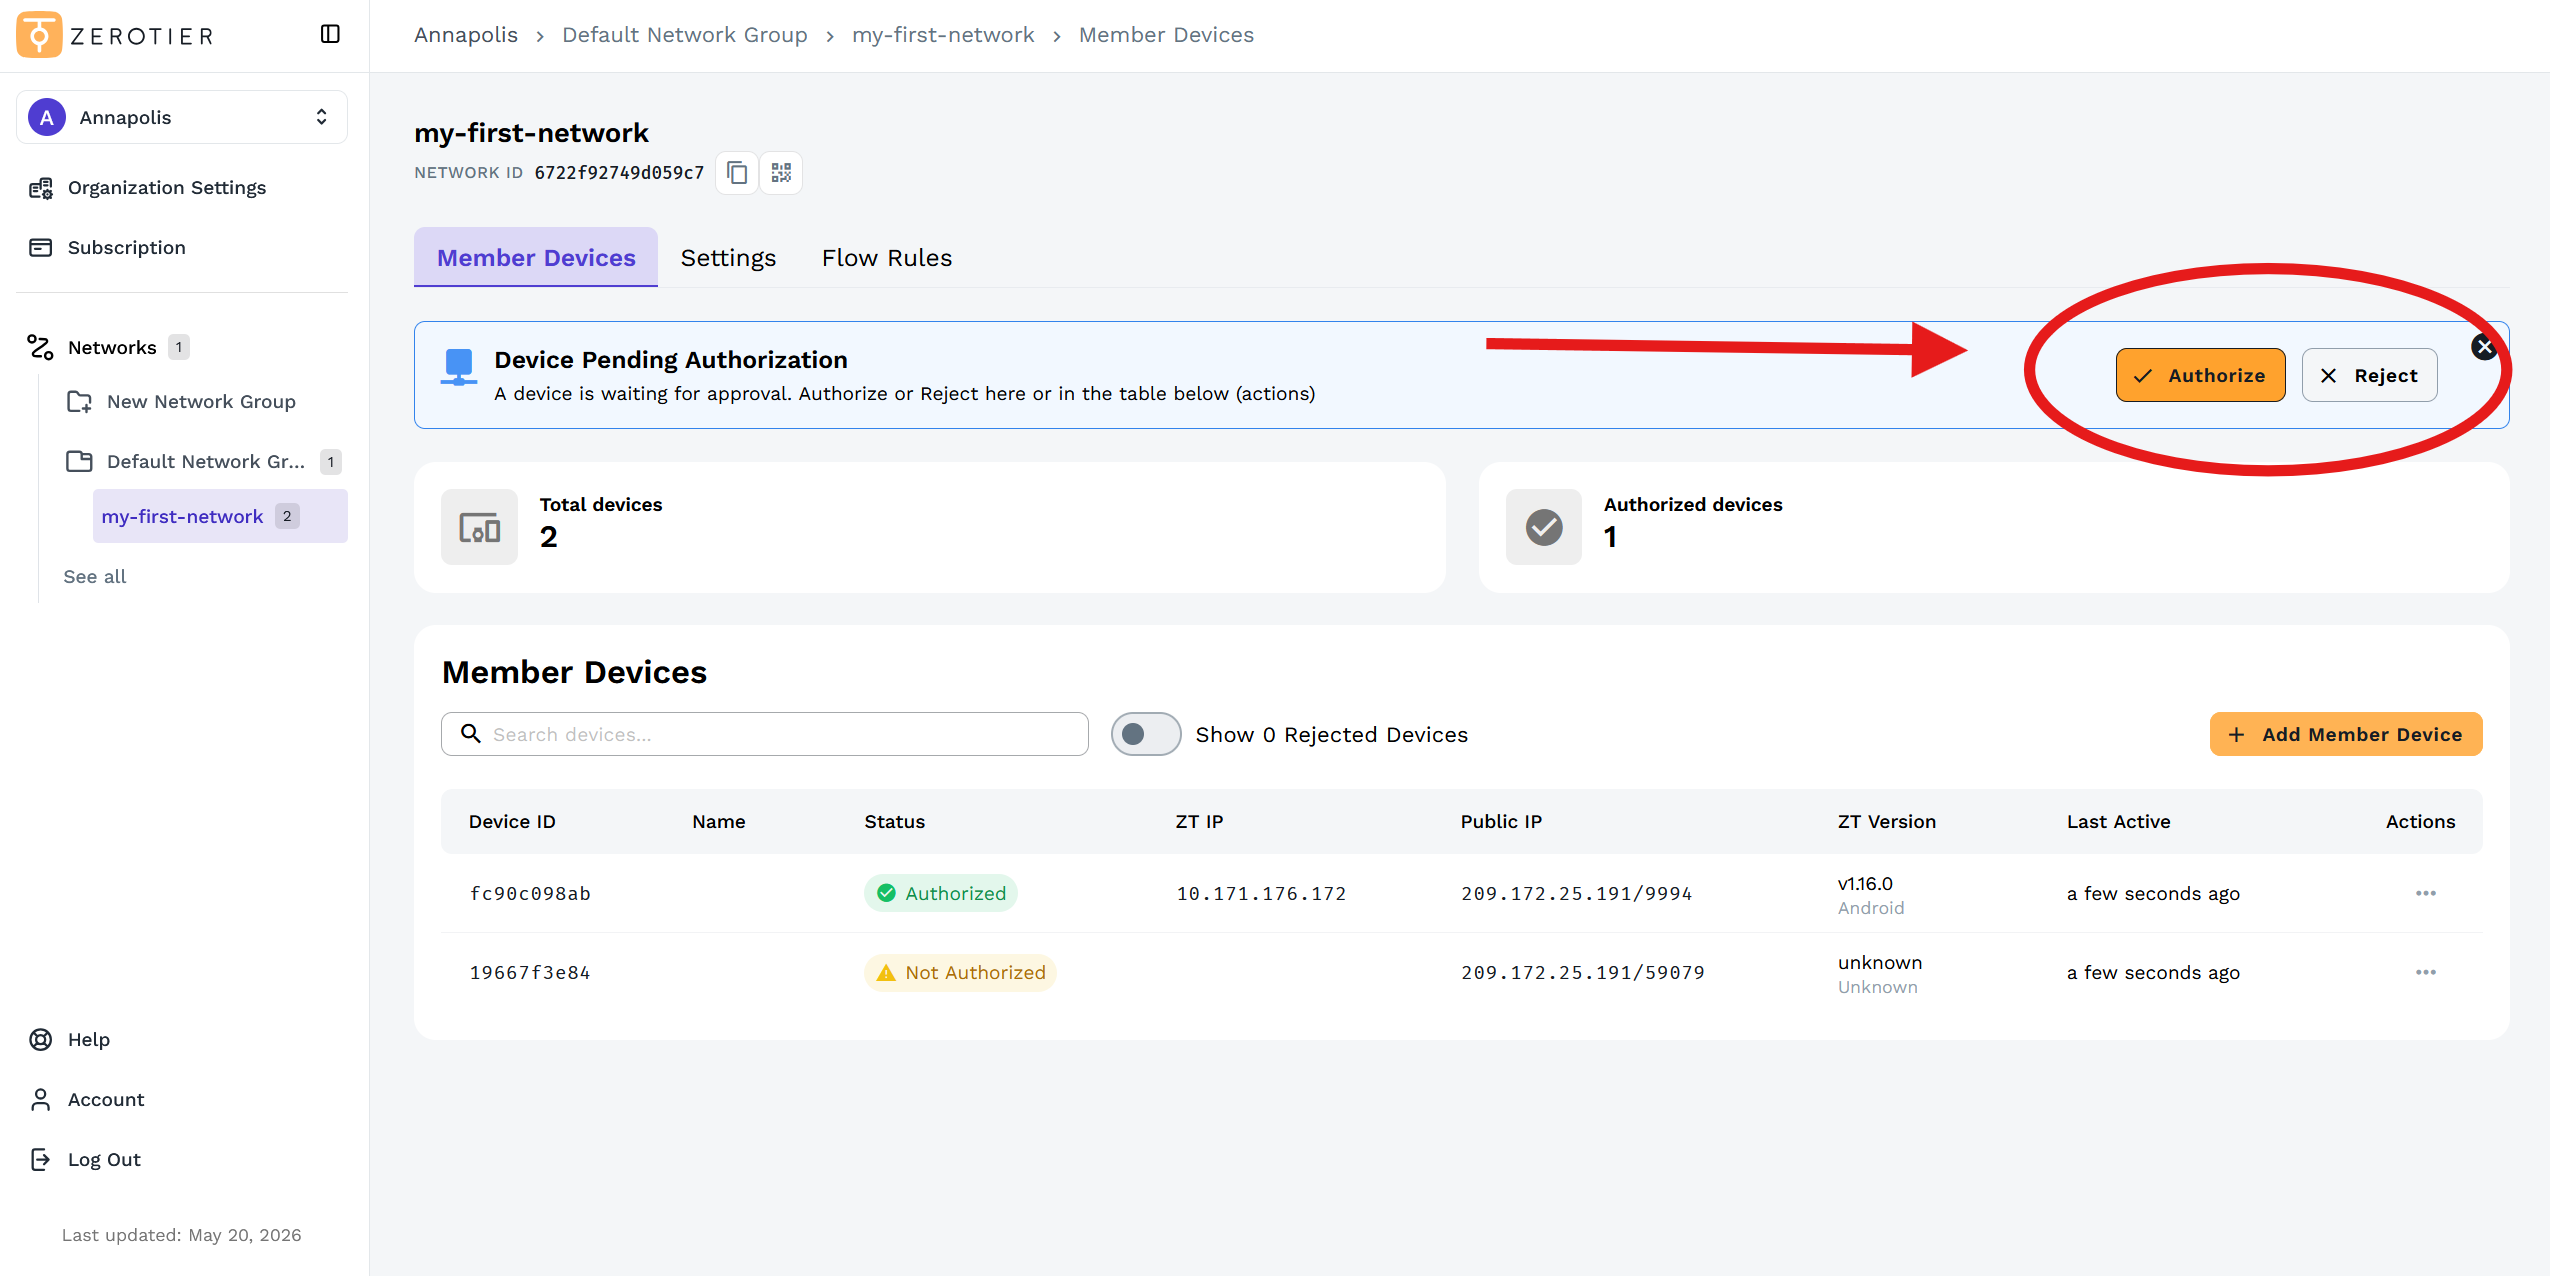
Option 2: Manage devices directly (Recommended)
- In the Member Devices tab, find the device with "Not Authorized" status
- Click the three-dot menu under Actions and select Authorize
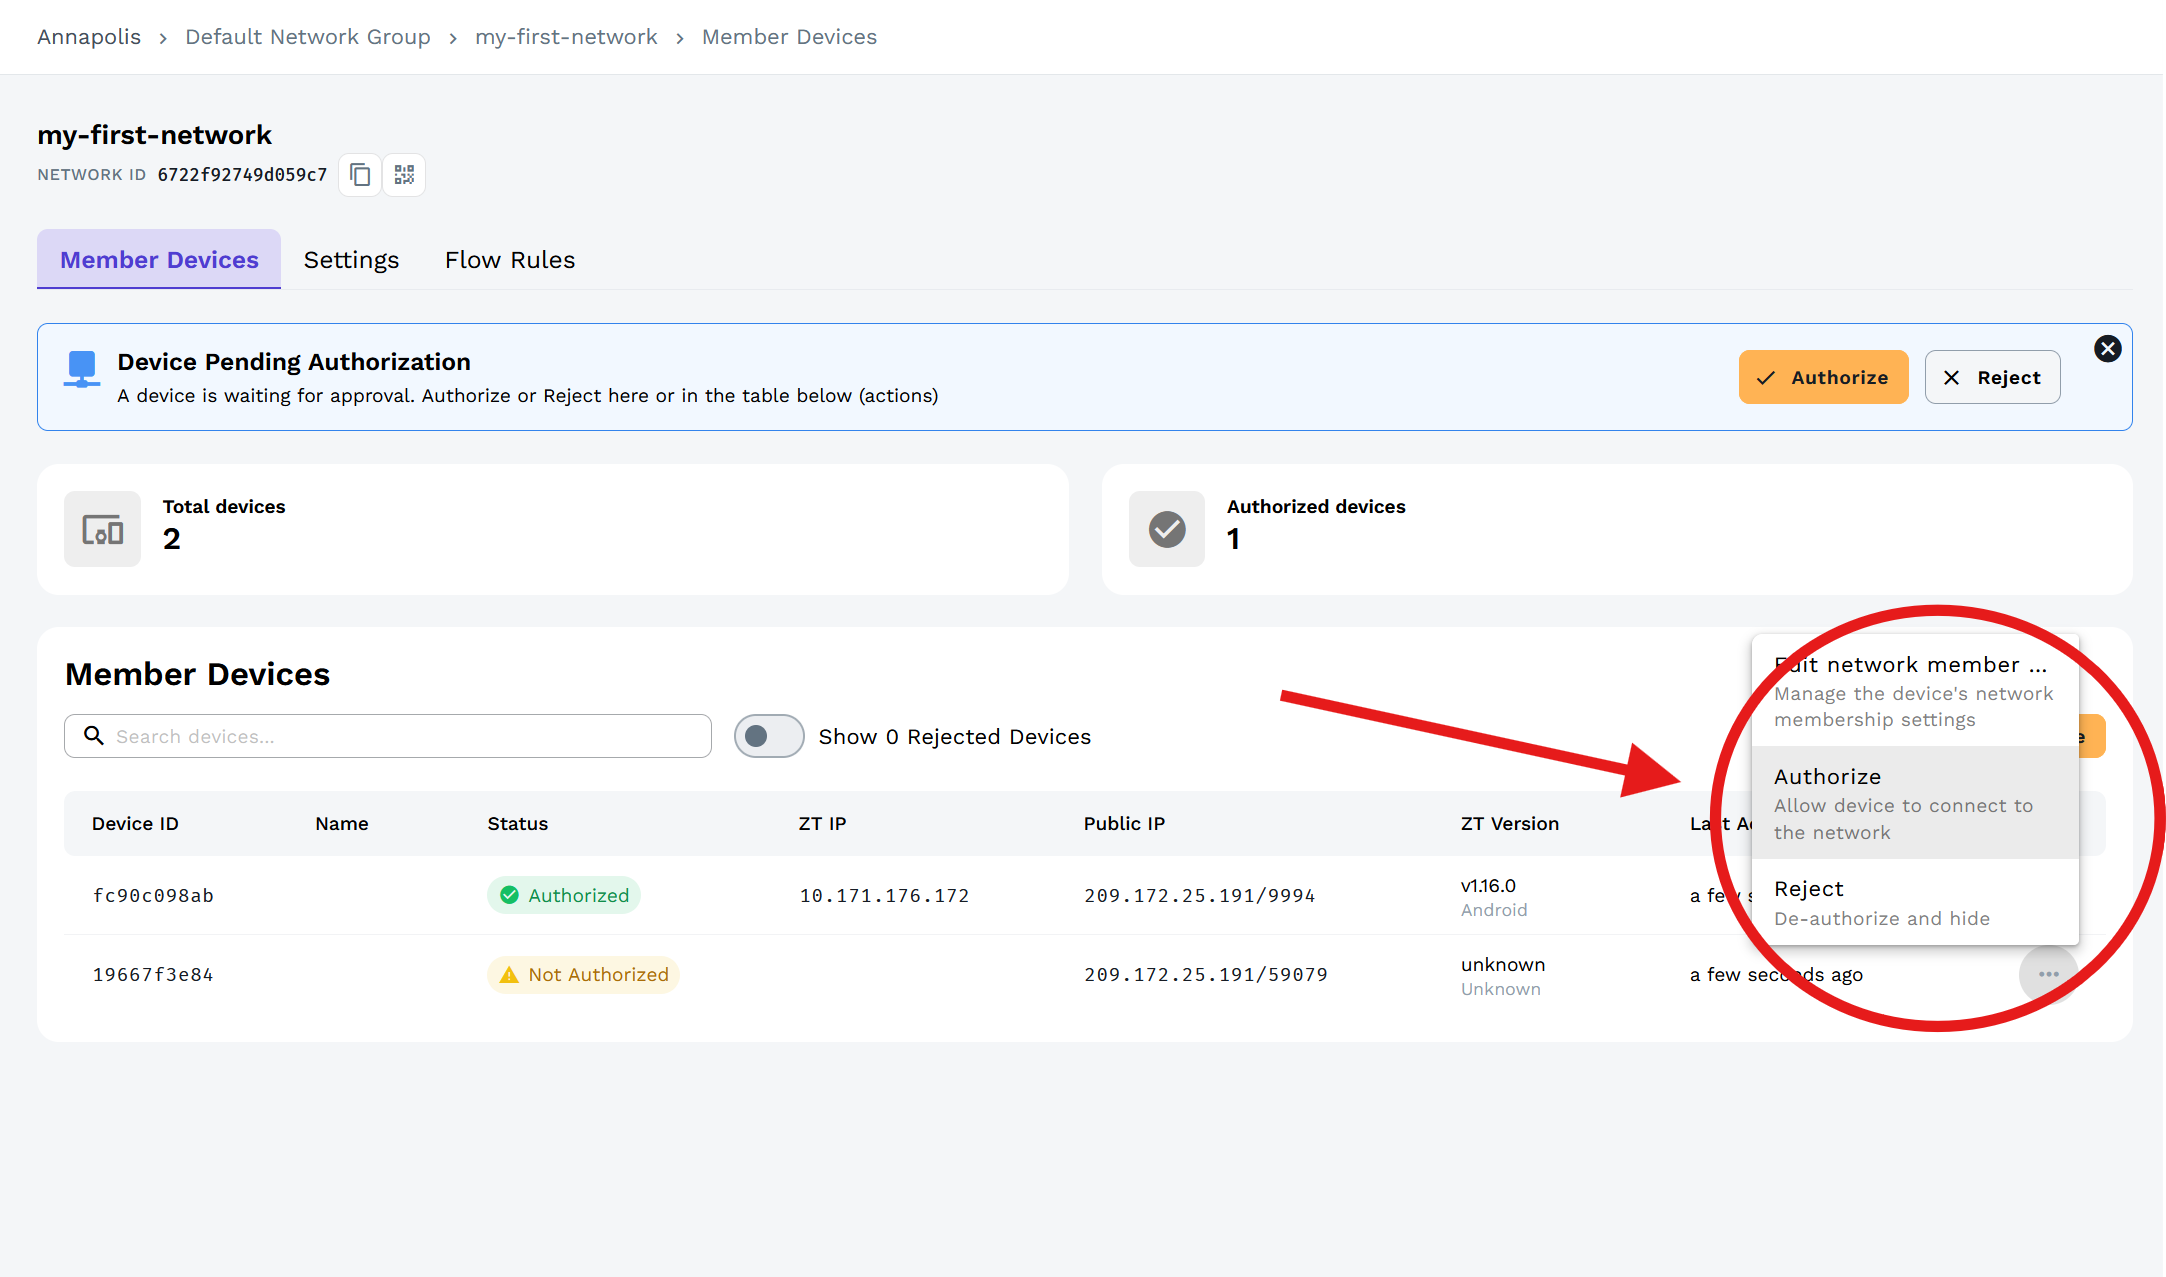
Managing devices directly is recommended to avoid accidental mass authorization.
6. Test Your Connection
Find Your IP Addresses
In the Member Devices section, note the ZT IP addresses (like 10.171.176.172)
Test the Connection
Replace MANAGED_IP with a device IP address. Don't ping yourself:
ping -n 3 MANAGED_IP
Success looks like this:
PING 10.147.17.101 (10.147.17.101): 56 data bytes
64 bytes from 10.147.17.101: icmp_seq=0 ttl=64 time=15.2 ms
64 bytes from 10.147.17.101: icmp_seq=1 ttl=64 time=12.1 ms
64 bytes from 10.147.17.101: icmp_seq=2 ttl=64 time=11.8 ms
Done. Your devices are connected.
Legacy Central Quickstart
1. Create Network
- Visit my.zerotier.com and log in
- Click Create A Network
- Copy the Network ID - 16 characters like
d5e04297a16fa690
Keep this tab open for step 4.
2. Install ZeroTier and Join Your Network
Download ZeroTier from zerotier.com/download. Install on each device.
3. Join Your Network
On PC/MacOS
- Locate the ZeroTier icon in your menu bar (if MacOS) or system tray (if Windows)
- Click the icon -> Join New Network...
- Paste your Network ID and click Join
Using CLI
The CLI works on any device with terminal access.
sudo zerotier-cli join NETWORK_ID
4. Authorize Your Devices
- Return to my.zerotier.com and click your network
- Scroll to the Members section
- Check the Auth? box next to each device to authorize
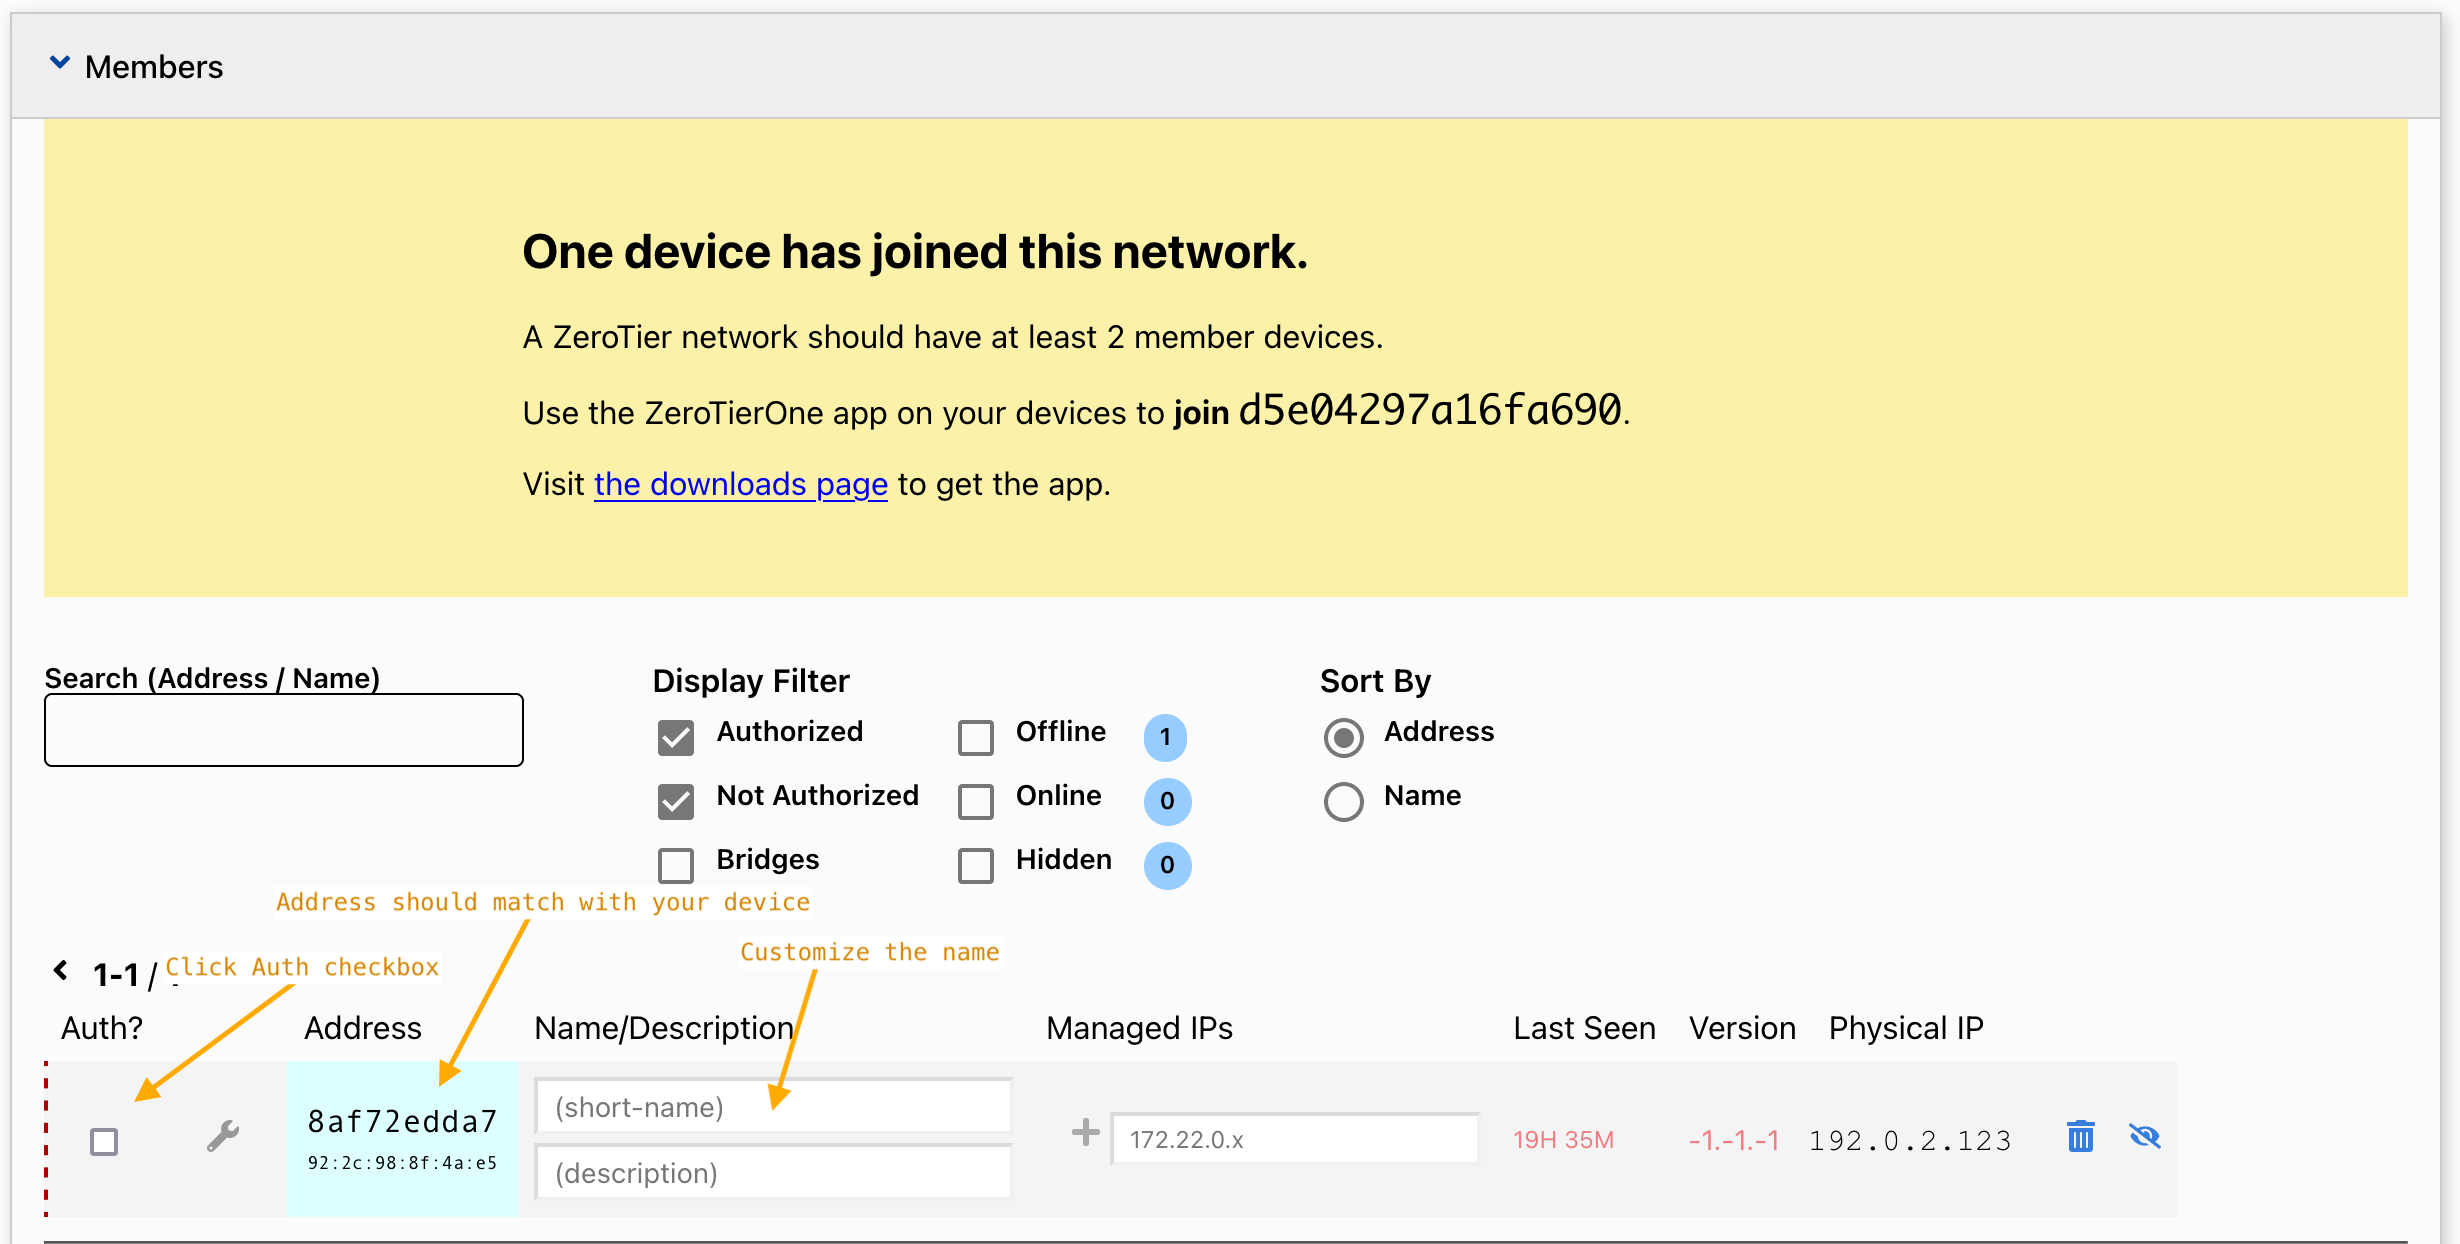
Green checkboxes appear under Auth*.*
5. Test Your Connection
Find Your IP Addresses
In the Members section on the website, note the Managed IP addresses (like 192.168.191.242)
Test the Connection
Replace MANAGED_IP with a device IP address. Don't ping yourself:
ping -n 3 MANAGED_IP
Success looks like this:
PING 10.147.17.101 (10.147.17.101): 56 data bytes
64 bytes from 10.147.17.101: icmp_seq=0 ttl=64 time=15.2 ms
64 bytes from 10.147.17.101: icmp_seq=1 ttl=64 time=12.1 ms
64 bytes from 10.147.17.101: icmp_seq=2 ttl=64 time=11.8 ms
Done. Your devices are connected.
Leaving a Network
Leave networks when you're done:
- Click the ZeroTier icon in your menu bar/system tray
- Click the network name to uncheck it (or use Network Details to uncheck the Connected checkbox)
- To permanently remove a network, use Network Details -> Delete Network
Alternatively, use the CLI command:
sudo zerotier-cli leave NETWORK_ID
Next Steps
Learn More About New Central
- New Central Overview - Comprehensive guide to New Central's features and capabilities
- Organizations and User Management
- Network Groups and Networks