Network Groups and Networks
ZeroTier Central is available in two versions. Please follow the appropriate instructions based on which version you are using:
- New Central - The modern interface with enhanced features and improved user experience (central.zerotier.com)
- Legacy Central - The original interface (my.zerotier.com)
Not sure which version you're using? See How to Check Your Central Version.
- New Central
- Legacy Central
New Central Network Management
Understanding the Hierarchy
New Central organizes your ZeroTier infrastructure in three levels:
- Organizations - The top level with its own billing and users
- Network Groups - Categories for organizing networks and managing access control
- Networks - Individual virtual networks where devices connect
When you create an Organization, it includes one Network Group and one Network by default.
Network Groups
Network Groups allow you to categorize and manage access control for many networks at once. This is particularly useful for organizing networks by department, project, or environment.
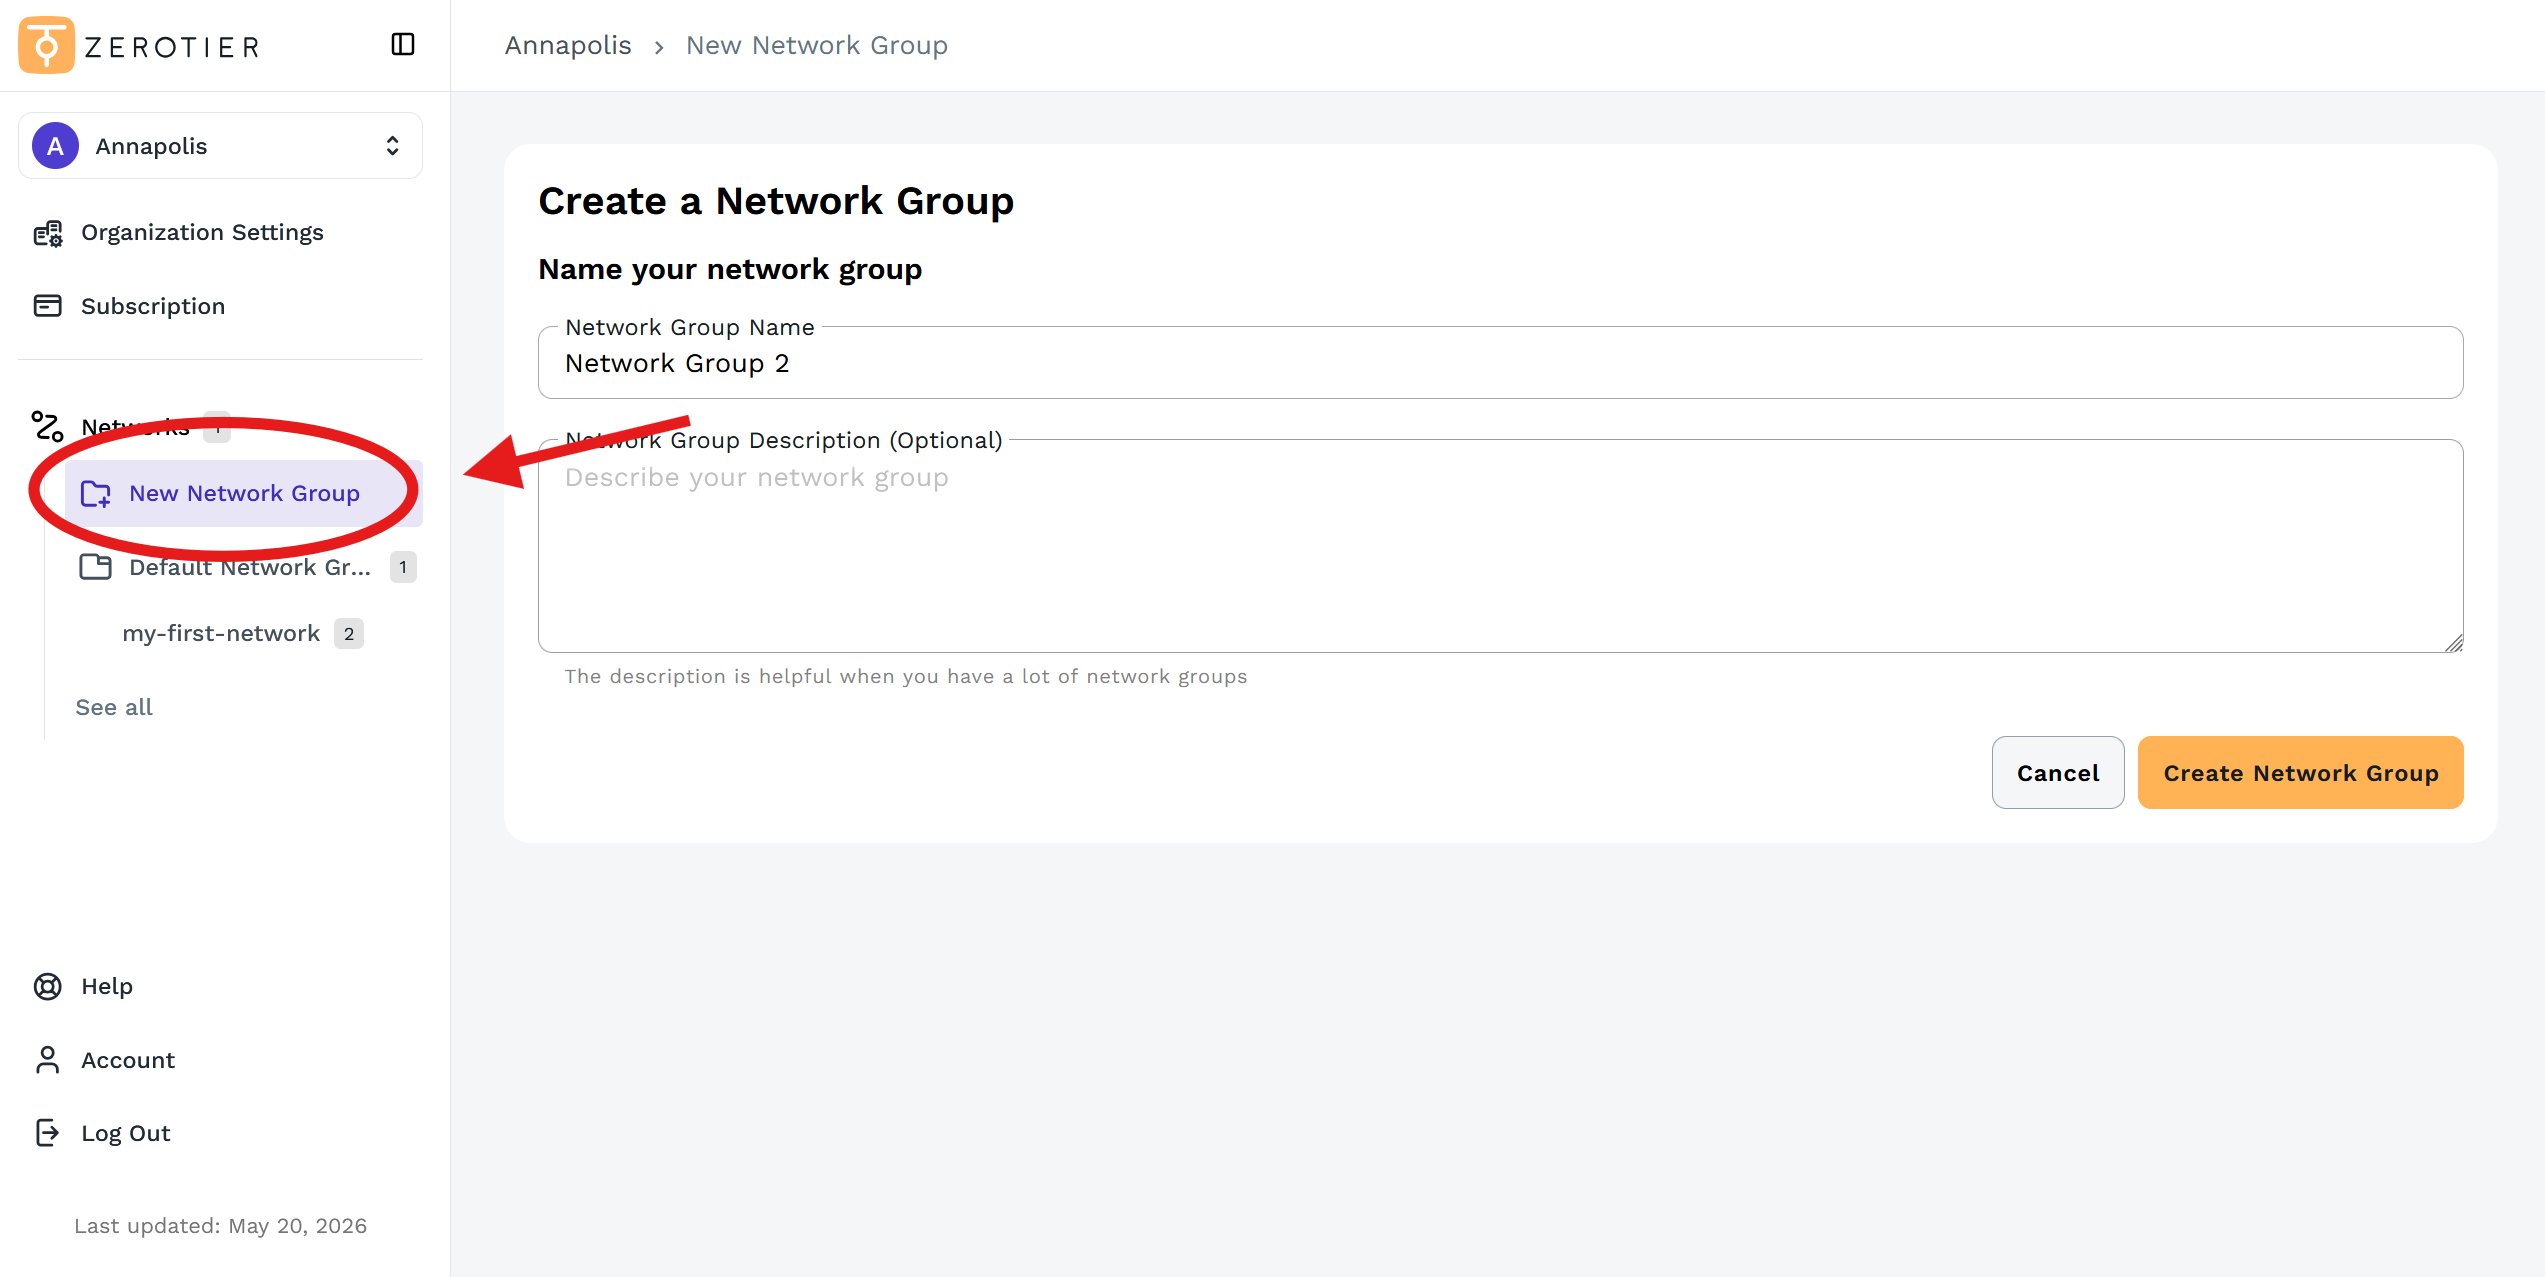
Creating a Network Group
- Click New Network Group in the left sidebar
- Enter a network group name and optional description
- Click Create Network Group
Managing a Network Group
- Access the network group from the Network Groups menu in the left sidebar
- Select the Settings tab
- Update name, description, or access controls as needed
Deleting a network group will delete all networks within that group. This action cannot be undone.
Create and Manage Networks
Networks are where your devices actually connect. Each network has its own Network ID, IP assignment settings, and member devices.
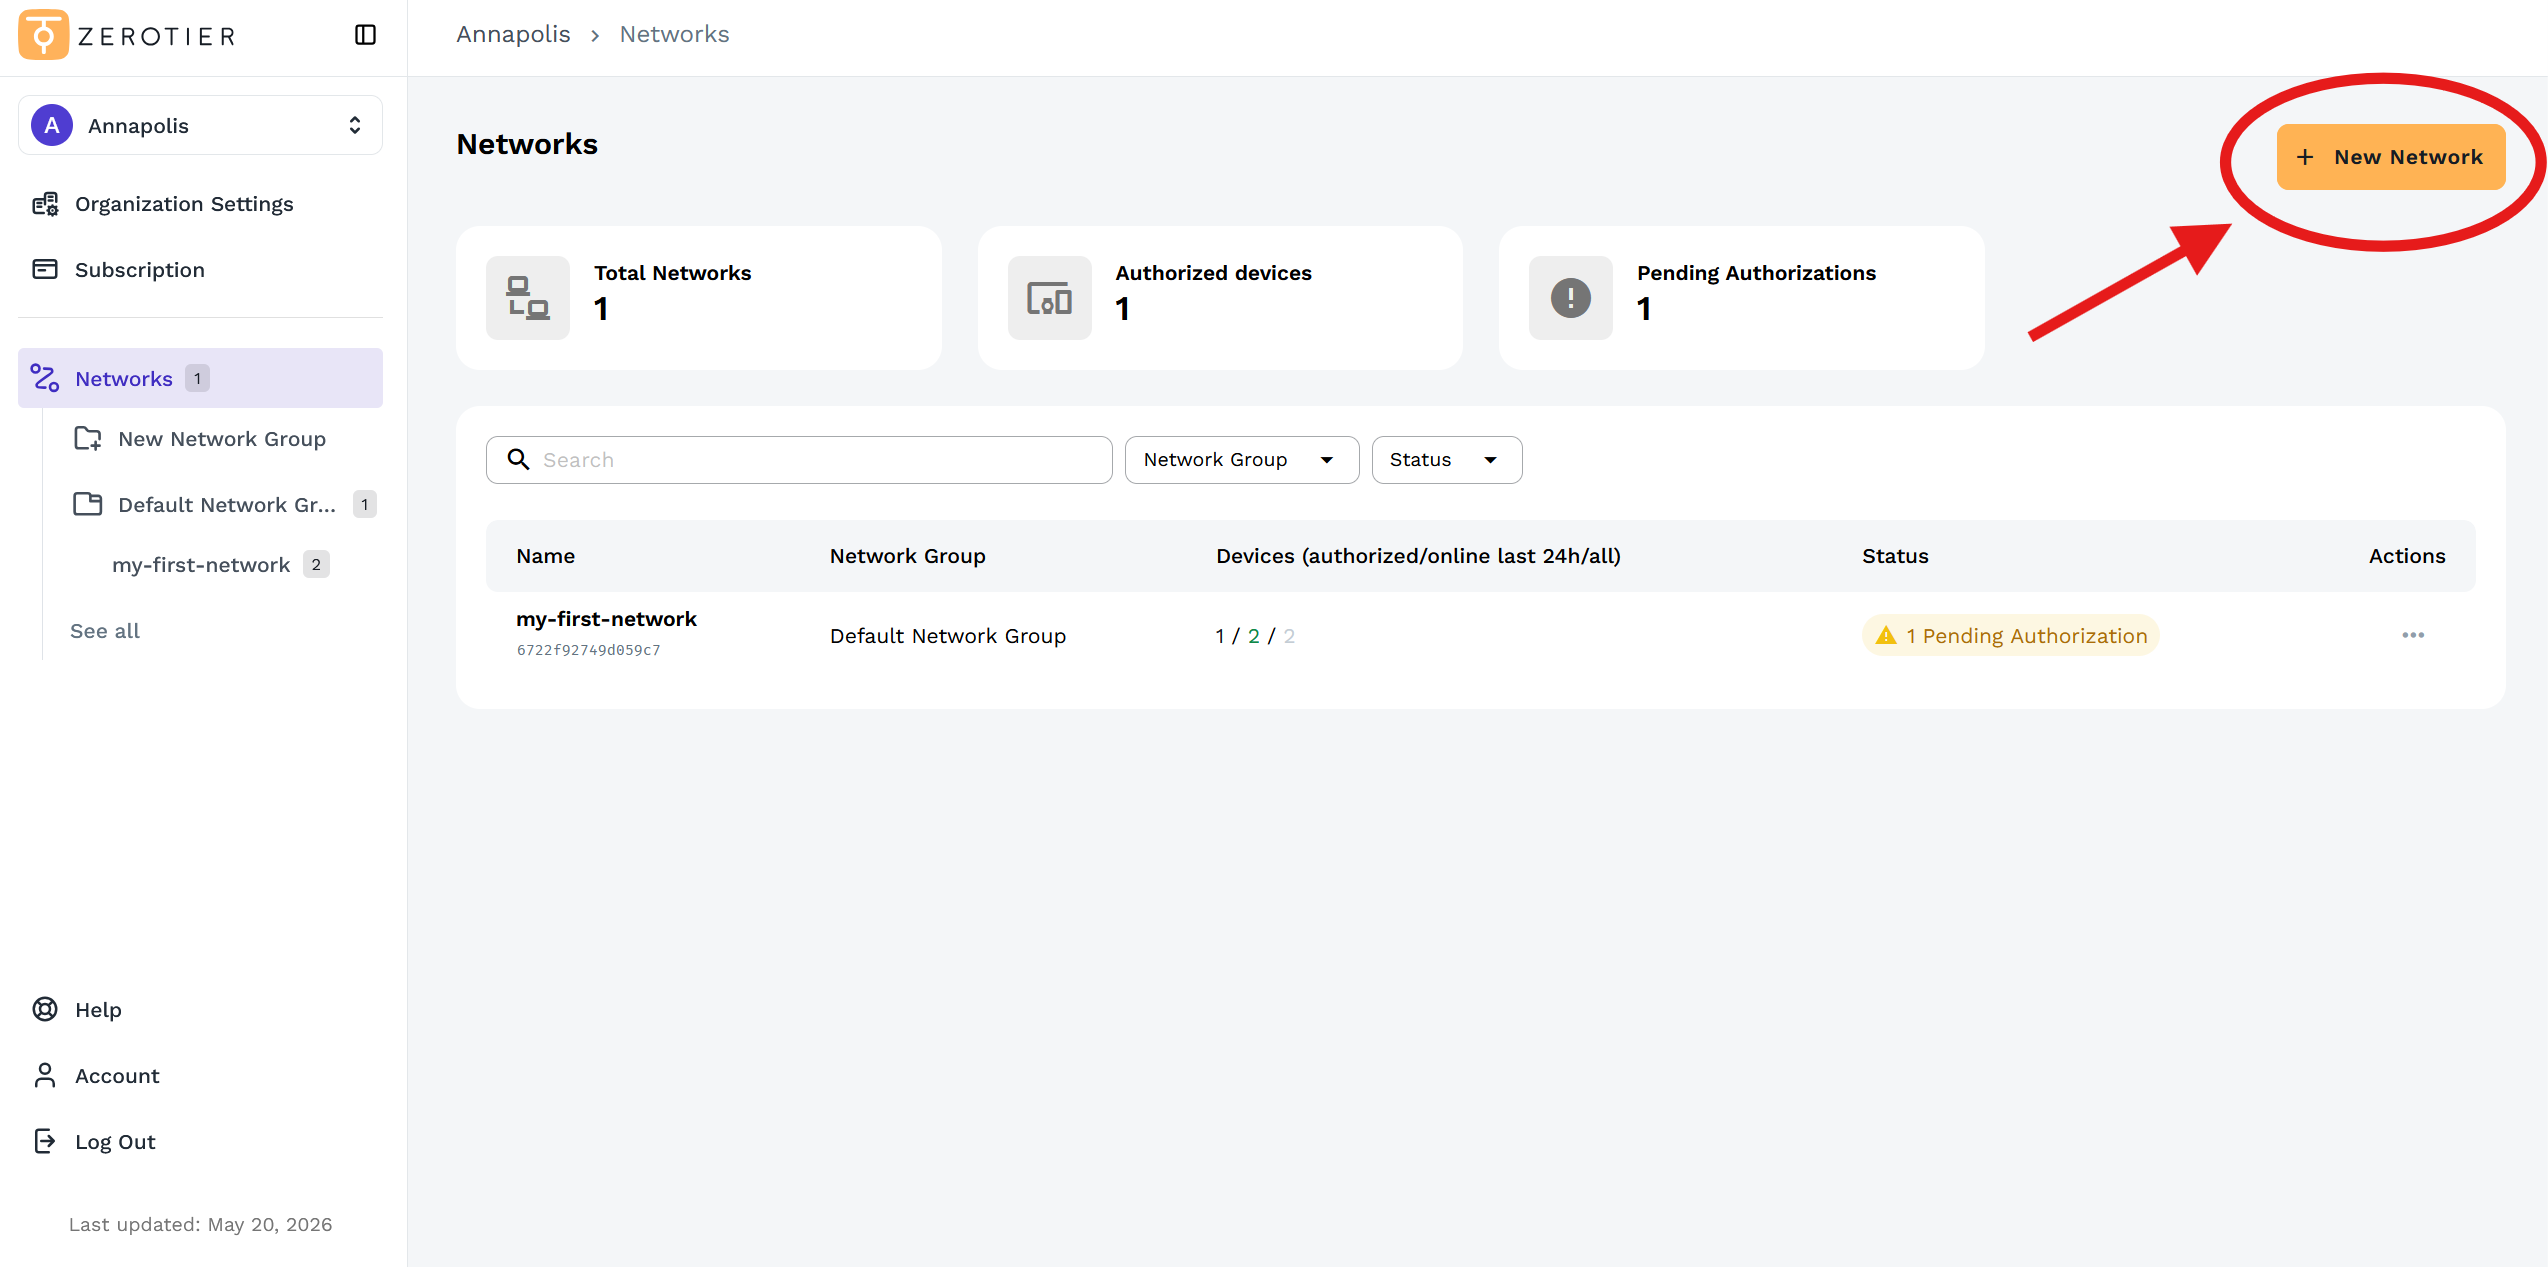
Creating a Network
Additional networks can be created from either:
- The Networks page (then assign to a Network Group)
- Within a specific Network Group (automatically assigned to that group)
Steps:
- Click New Network in the top-right corner of the Networks page
- The network is created with a unique 16-character Network ID
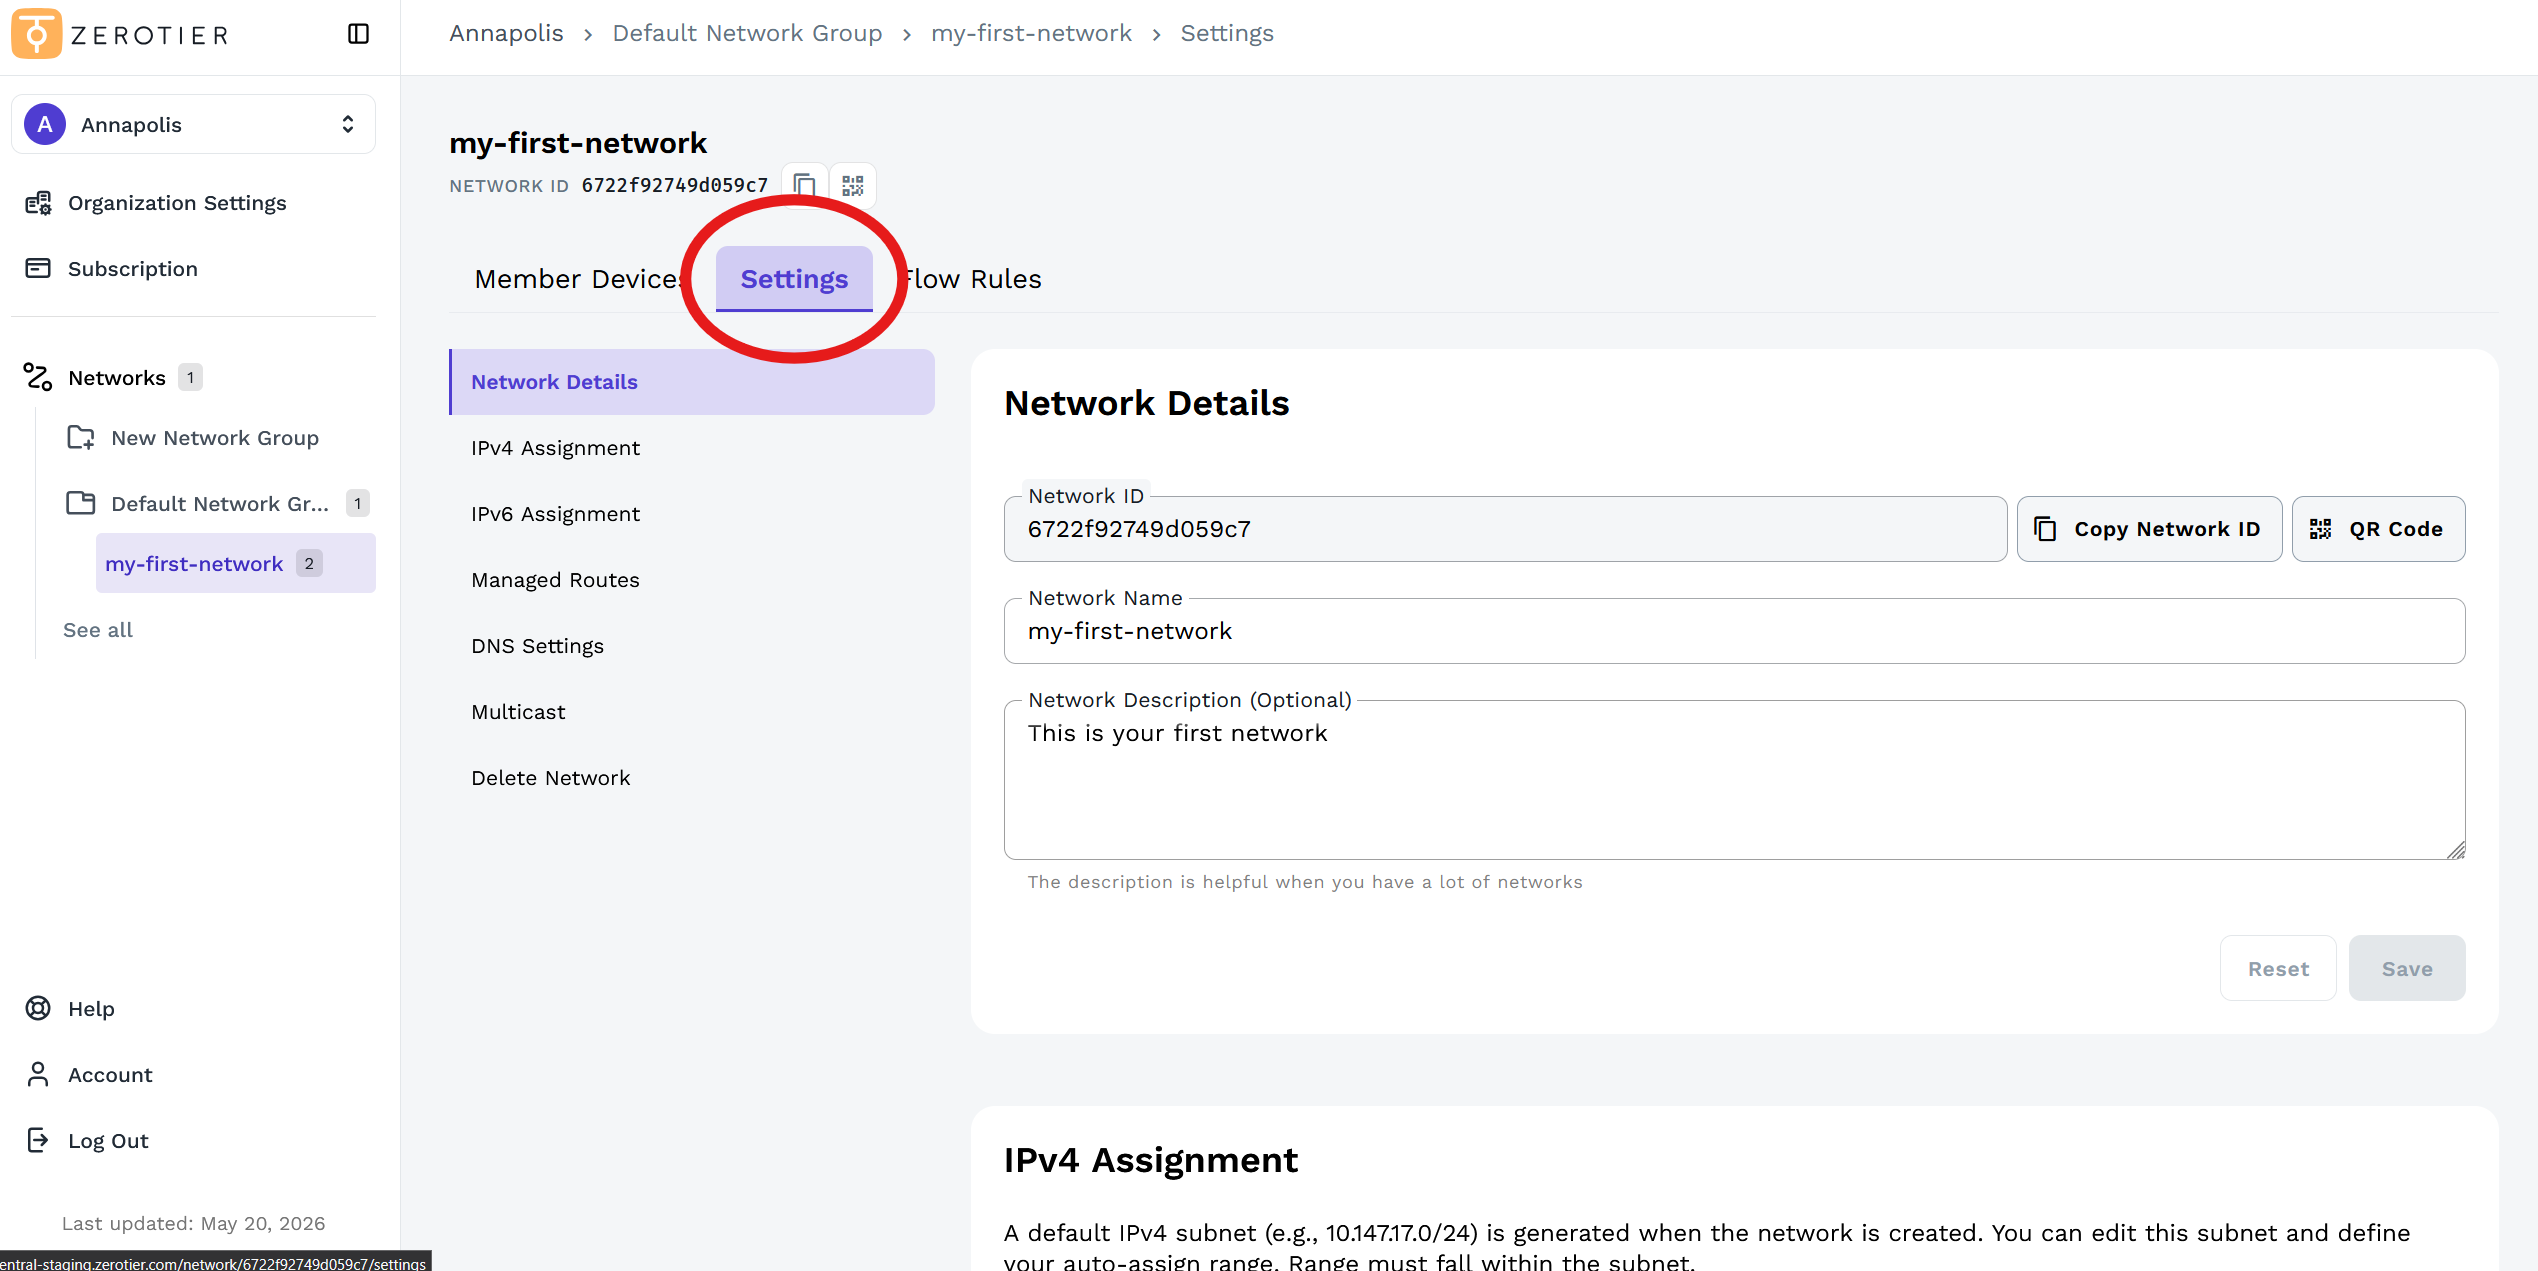
Managing Network Settings
- Click on your network from the left sidebar
- Click the Settings tab
Here you can configure:
- Network Details - Network ID, name, and description
- IPv4 Assignment - Configure managed IP ranges and settings
- IPv6 Assignment - Configure IPv6 settings
- Managed Routes - Add routes for bridging or advanced networking
- DNS Settings - Configure network DNS settings
- Multicast - Enable multicast support
Add a Device
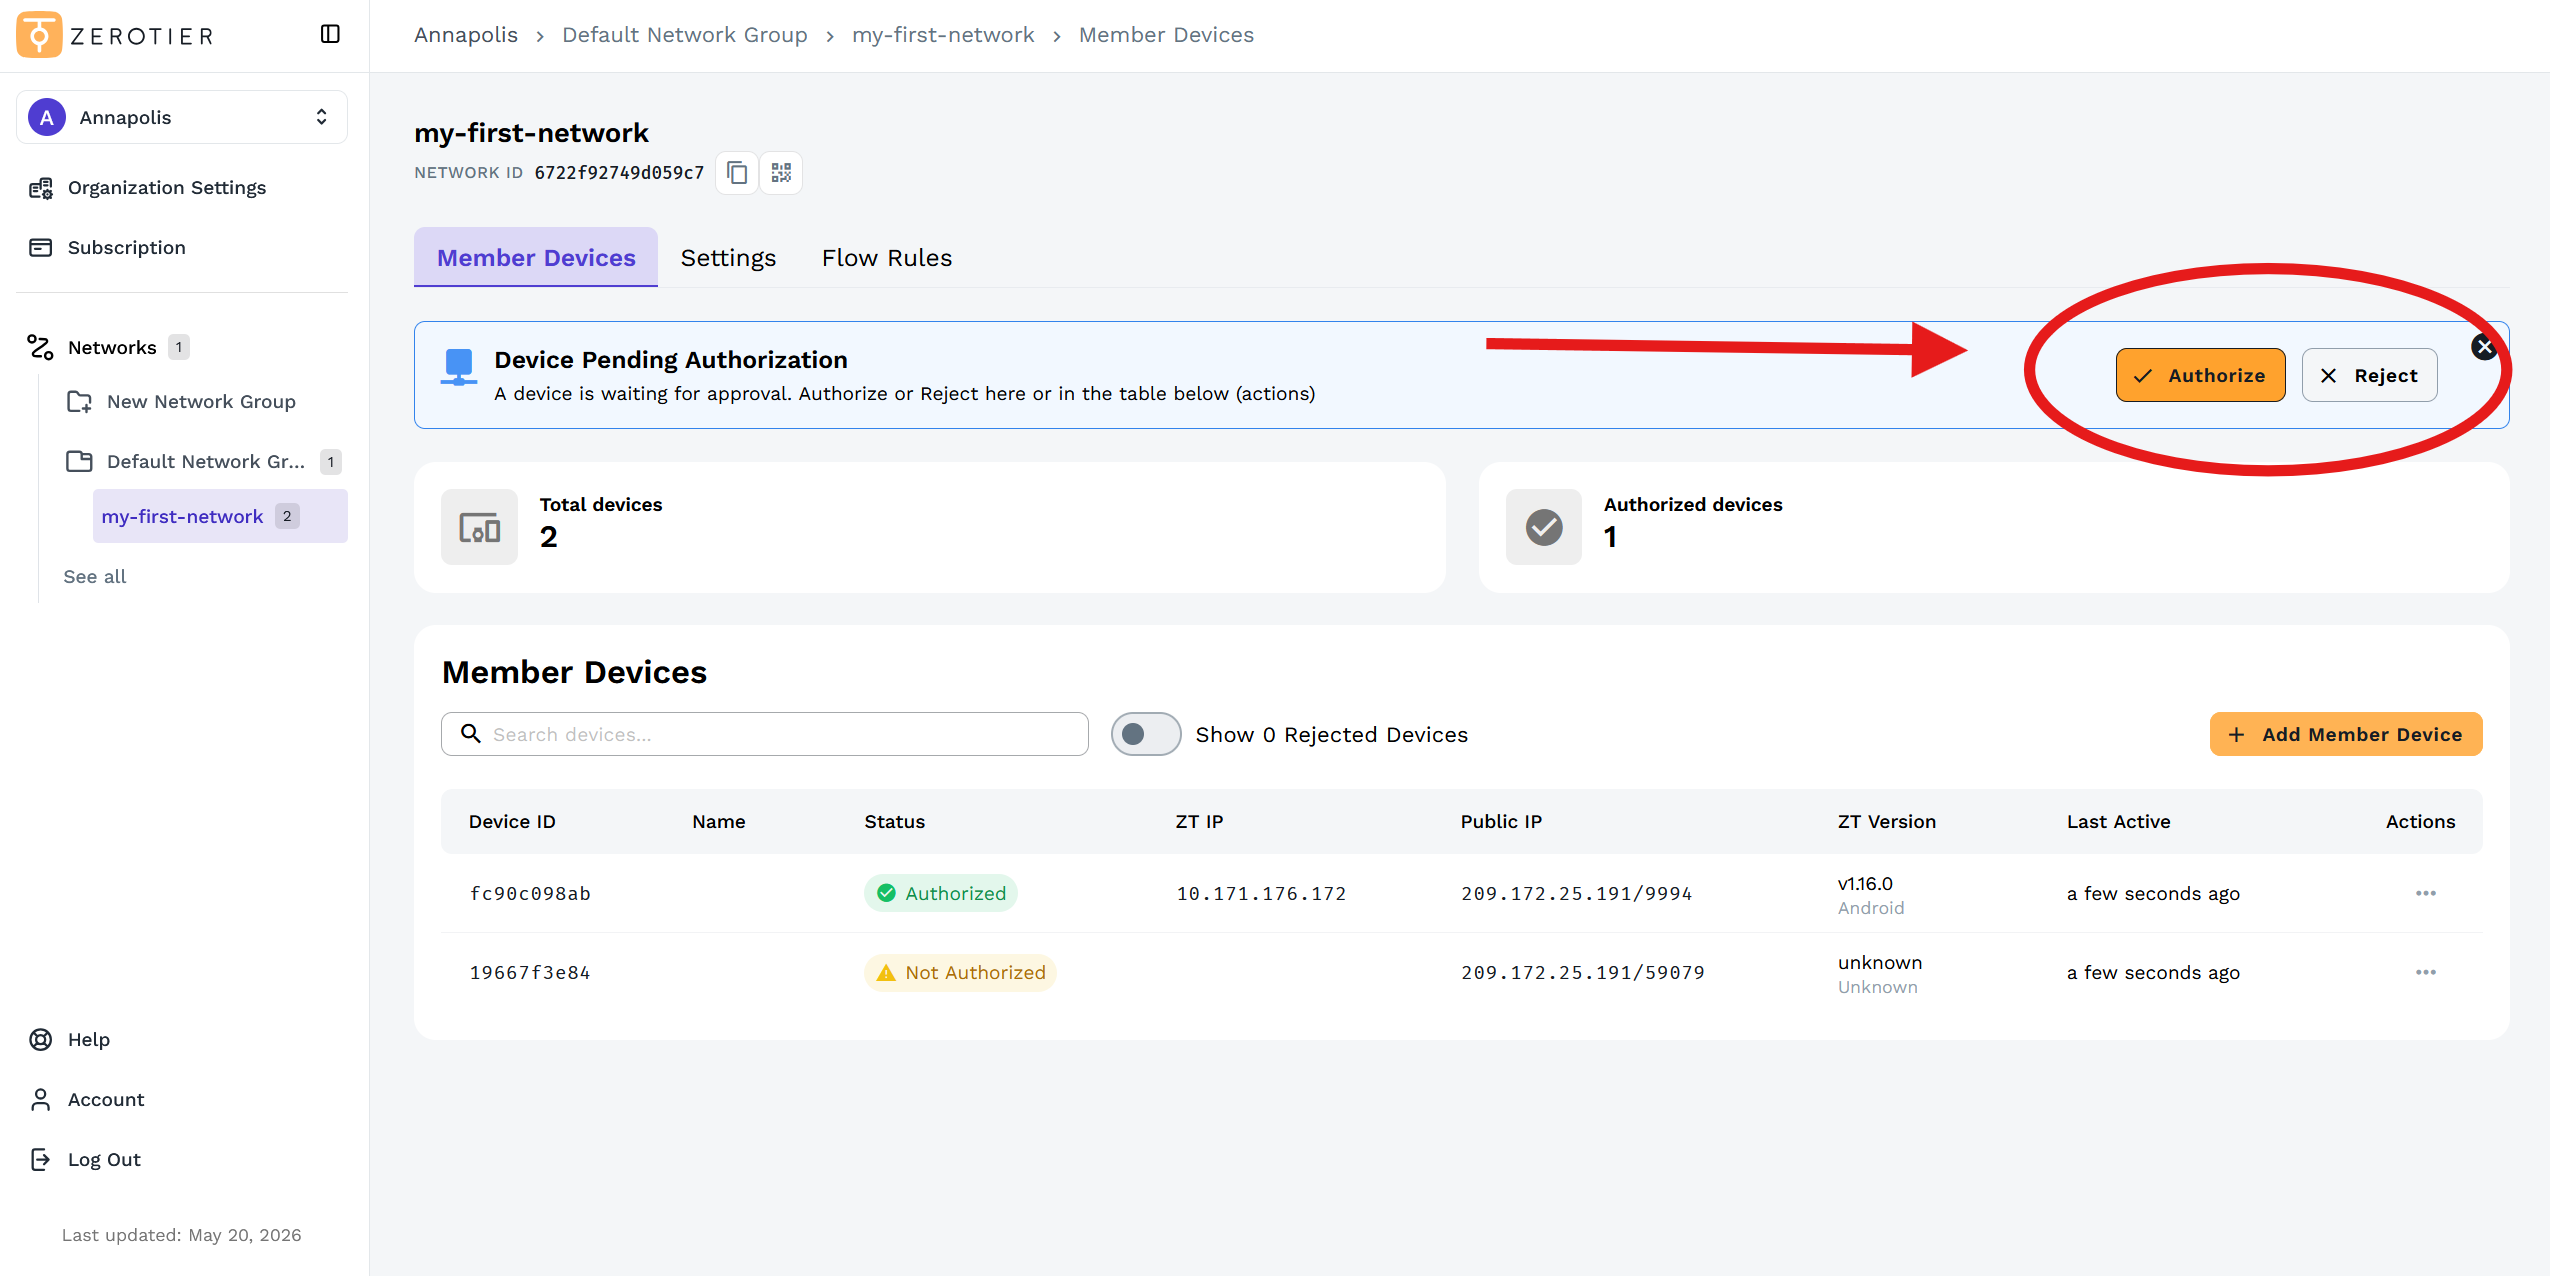
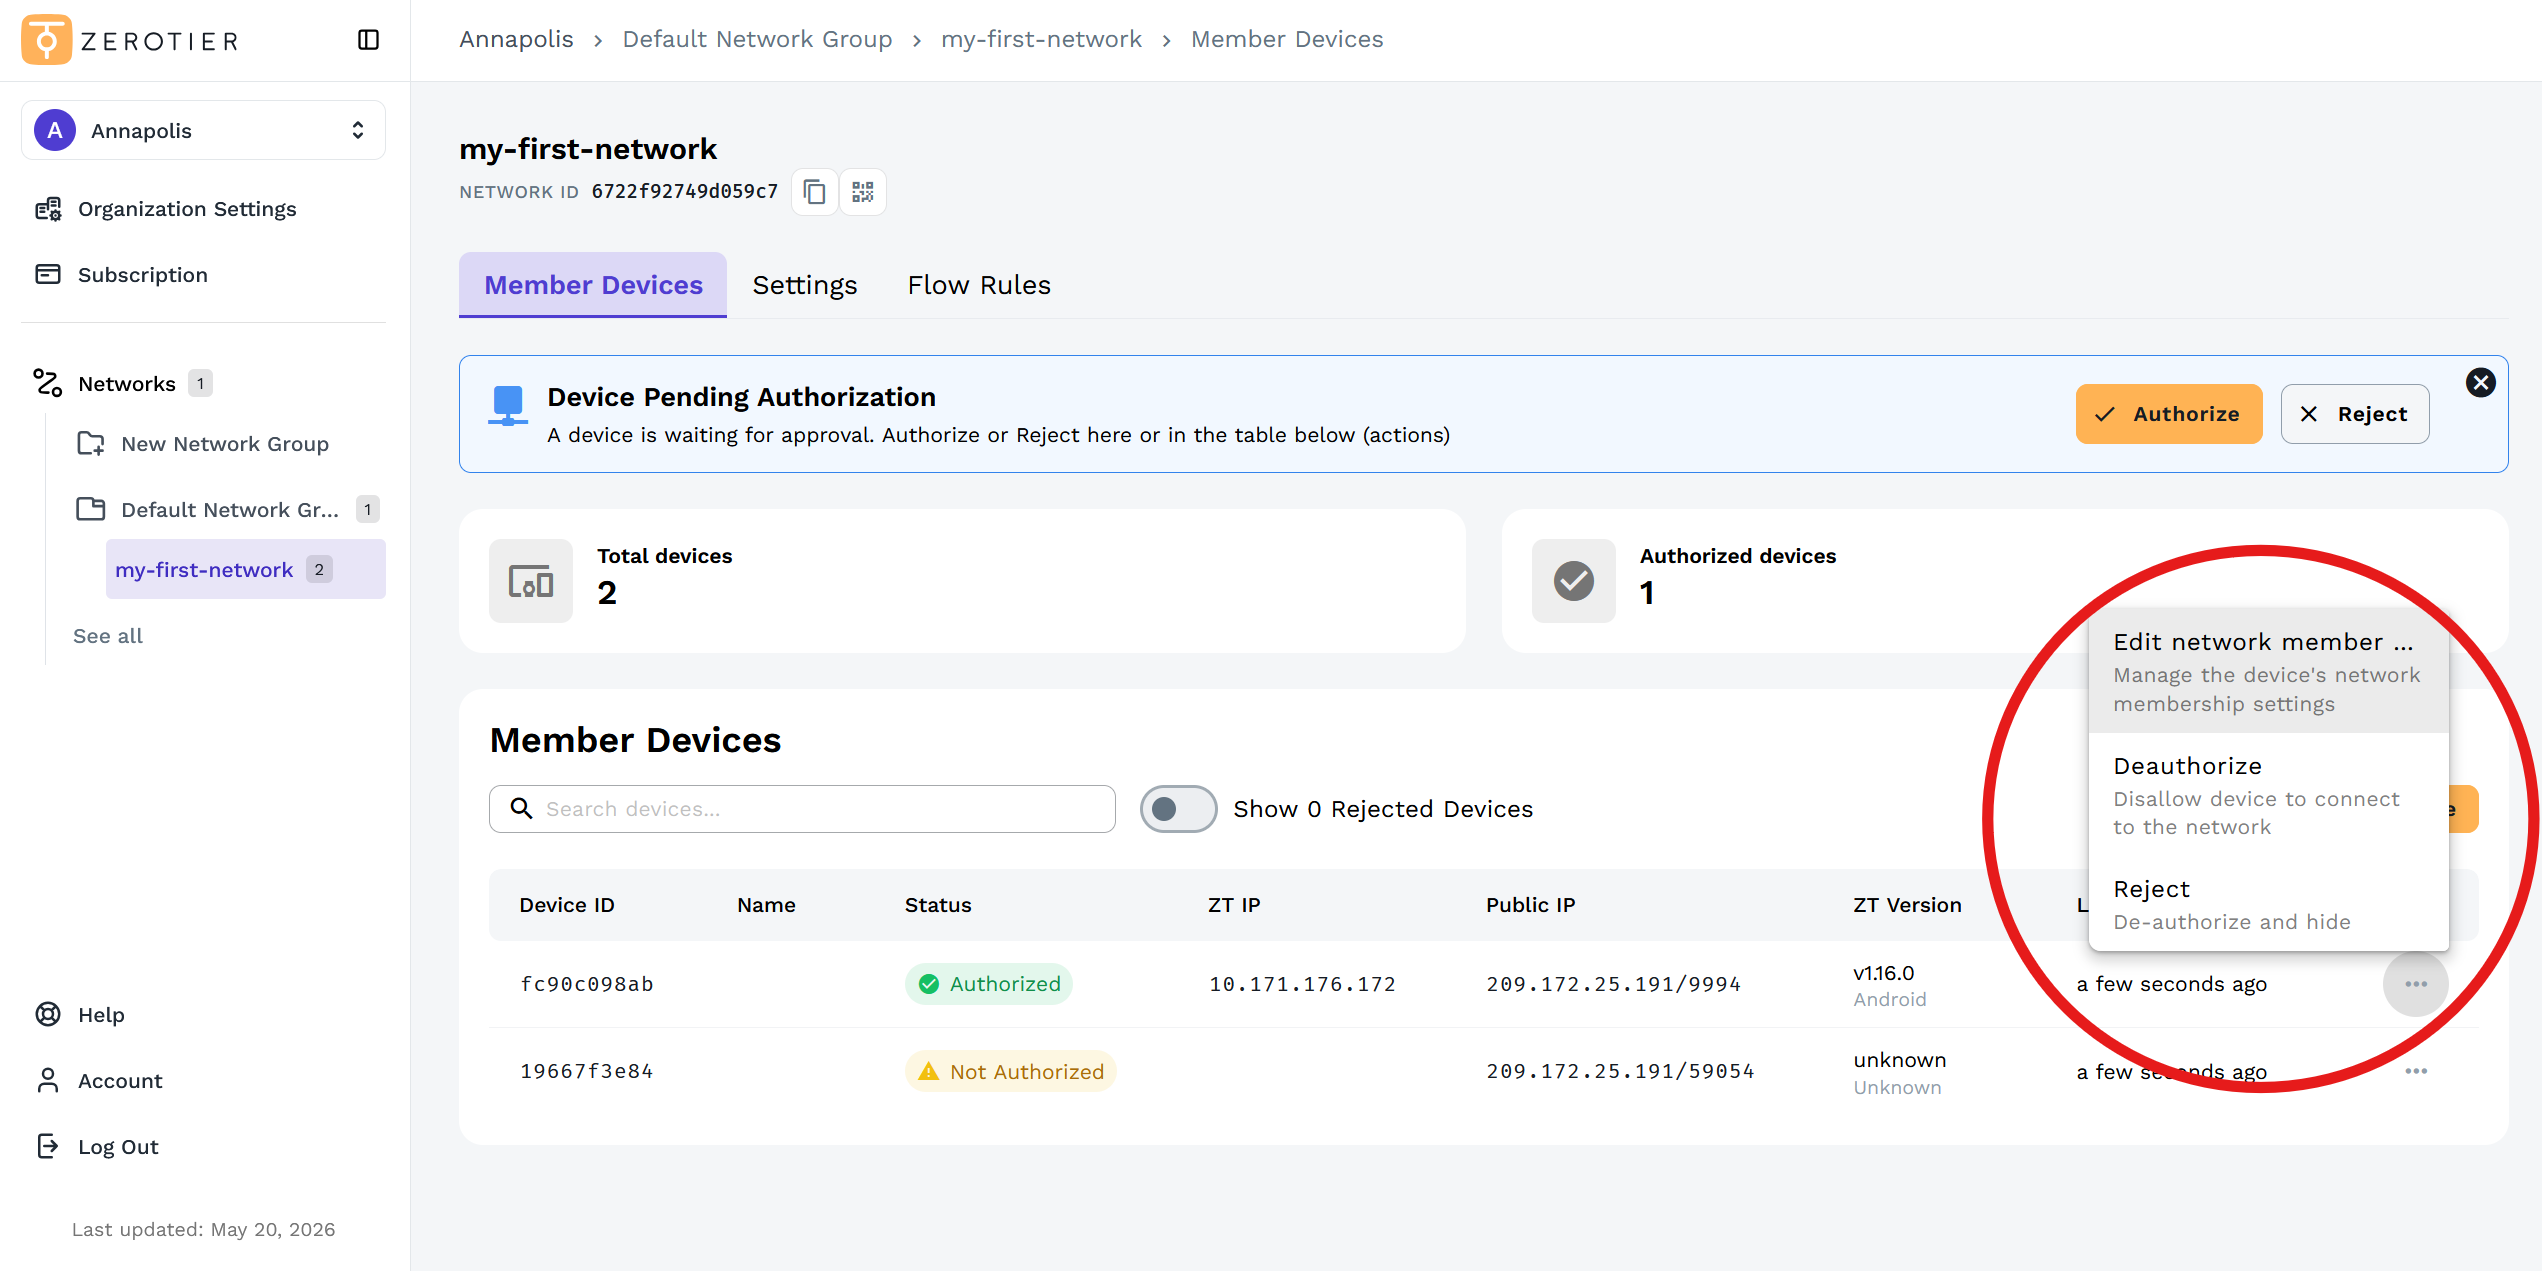
When a device joins your network, it will appear in the Member Devices tab and needs to be authorized.
- Open your network
- Navigate to the Member Devices tab
- A notification banner will appear showing the pending device
- Click Authorize in the banner to approve the device
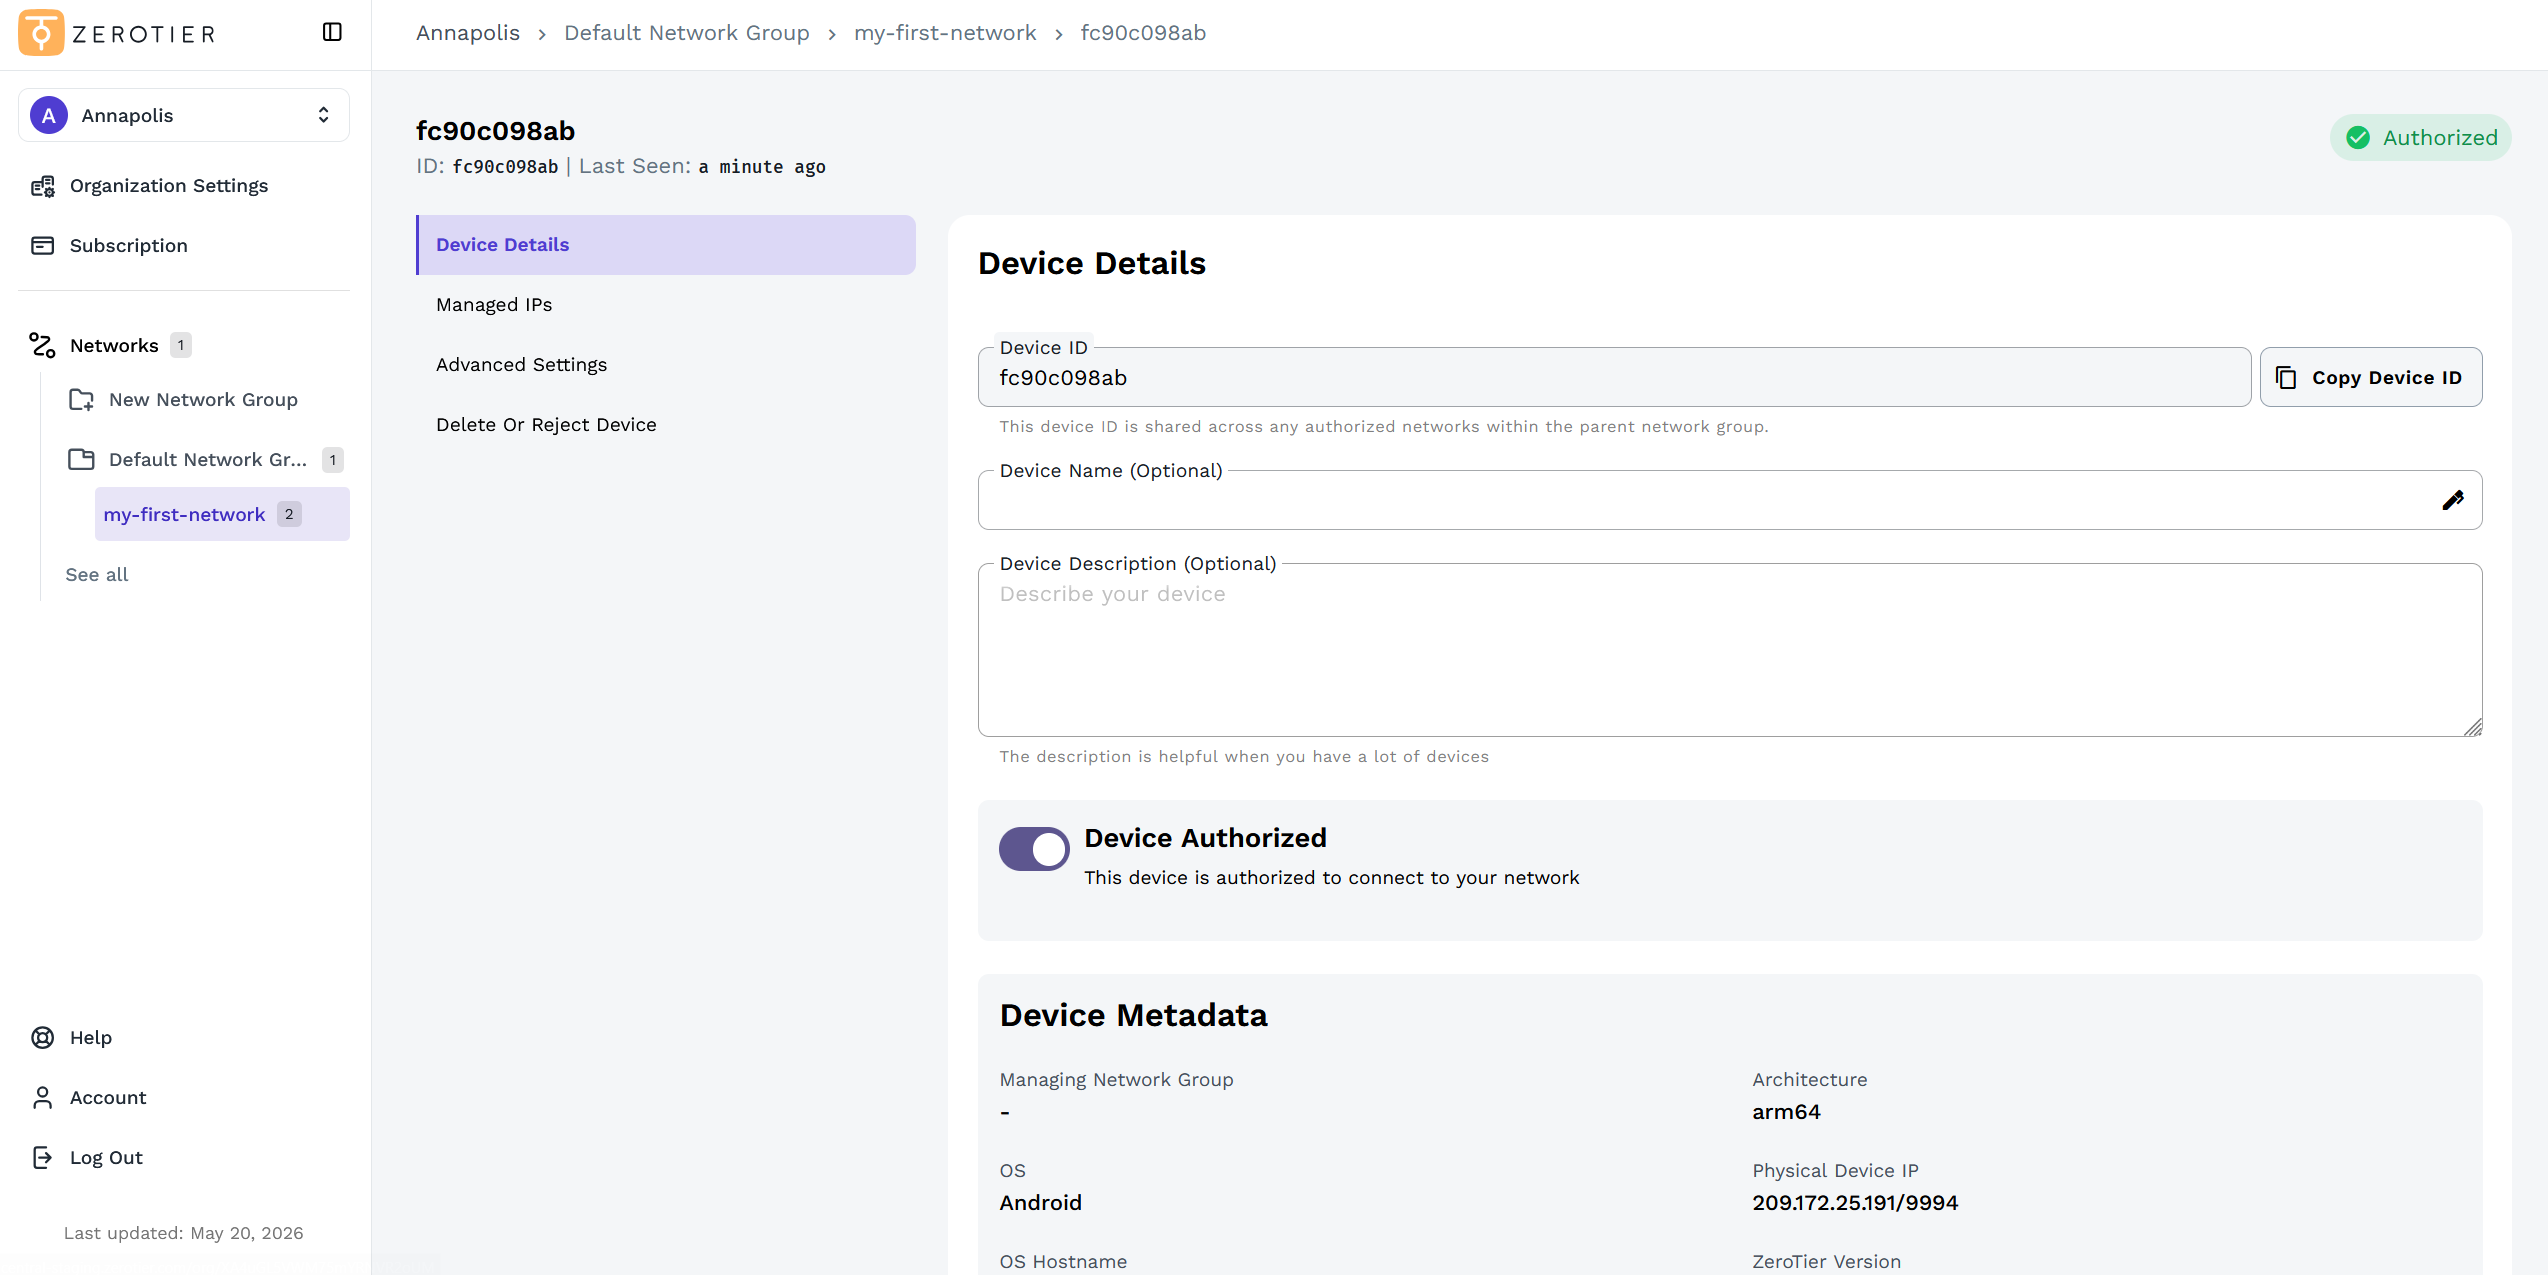
Manage Devices
Once devices are on your network, you can manage them from the Member Devices tab.
Authorize a Device
New devices that join your network must be authorized before they can communicate:
- Navigate to the Member Devices tab
- Find the device in the list with "Not Authorized" status
- Click the three-dot menu and select Authorize
De-authorize a Device
To temporarily remove a device from the network without deleting it:
- Navigate to the Member Devices tab
- Find the device you want to de-authorize
- Click the three-dot menu and select Deauthorize
The device will remain in your list but won't be able to communicate on the network.
De-authorized devices do not count toward your device limits. Only authorized devices are counted.
Reject a Device
To reject and hide a device from the member list:
- Navigate to the Member Devices tab
- Find the device you want to reject
- Click the three-dot menu and select Reject
The device will be de-authorized and hidden from view. Rejected devices can be revealed by toggling the Show Rejected Devices option.
Manually Add a Device
If you need to add a device by its Node ID, you can manually add it:
- Navigate to the Member Devices tab
- Click Add Member Device in the top-right corner
- Enter the device's Node ID (10-character identifier)
- The device will appear in your Member Devices list and can then be authorized
You can find a device's Node ID in the ZeroTier app on that device.
Adding Devices to a Network
- From your Network page, copy the Network ID
- Install ZeroTier on your device
- Join the network using the Network ID (via UI or CLI)
- Return to New Central - a pop-up will appear for the new device
- Click Authorize to approve, or Reject to deny
Alternatively, authorize devices directly in the Member Devices tab to avoid accidental bulk authorizations.
Next Steps
- Learn about Organizations and user management
- Review the New Central overview
- Set up DNS for your network
- Configure Managed Routes to connect to physical networks
- Learn about Network Routes and Subnets for advanced networking
Legacy Central Network Management
In the Legacy Central interface, networks are managed directly from your account without the Network Groups layer.
Creating a Network
- Visit my.zerotier.com and log in
- Click Create A Network
- Your network is created with a unique 16-character Network ID
Managing Network Settings
- Click on your network from the networks list
- Scroll through the page to access different settings sections:
- Name - Identify your network
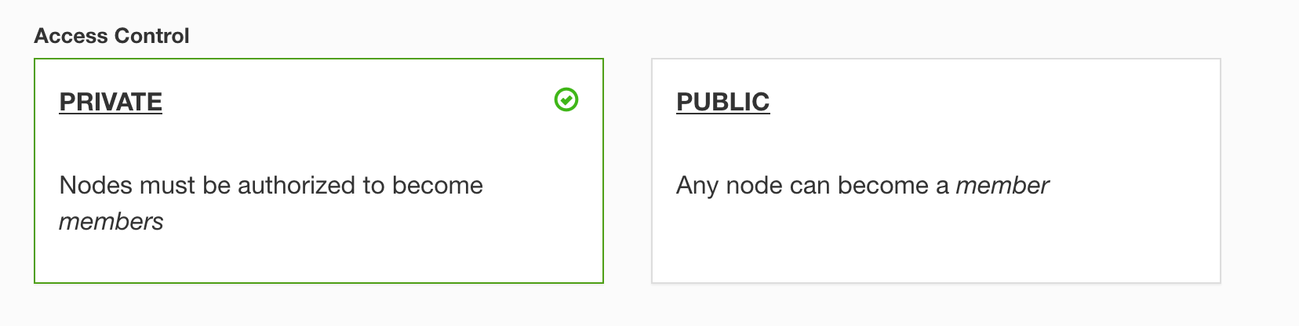
- Access Control - Public vs Private network
- IP Assignment - Managed routes and IP pools
- Advanced Settings - Multicast, broadcast, and more
- Flow Rules - Custom network rules
Managing Network Devices
- Open your network
- Scroll to the Members section
- Check the Auth checkbox to authorize devices
- Configure device-specific settings like IP assignments
Hiding or Deleting Devices
There are delete and hide buttons on the right side of the device list in the Members section.
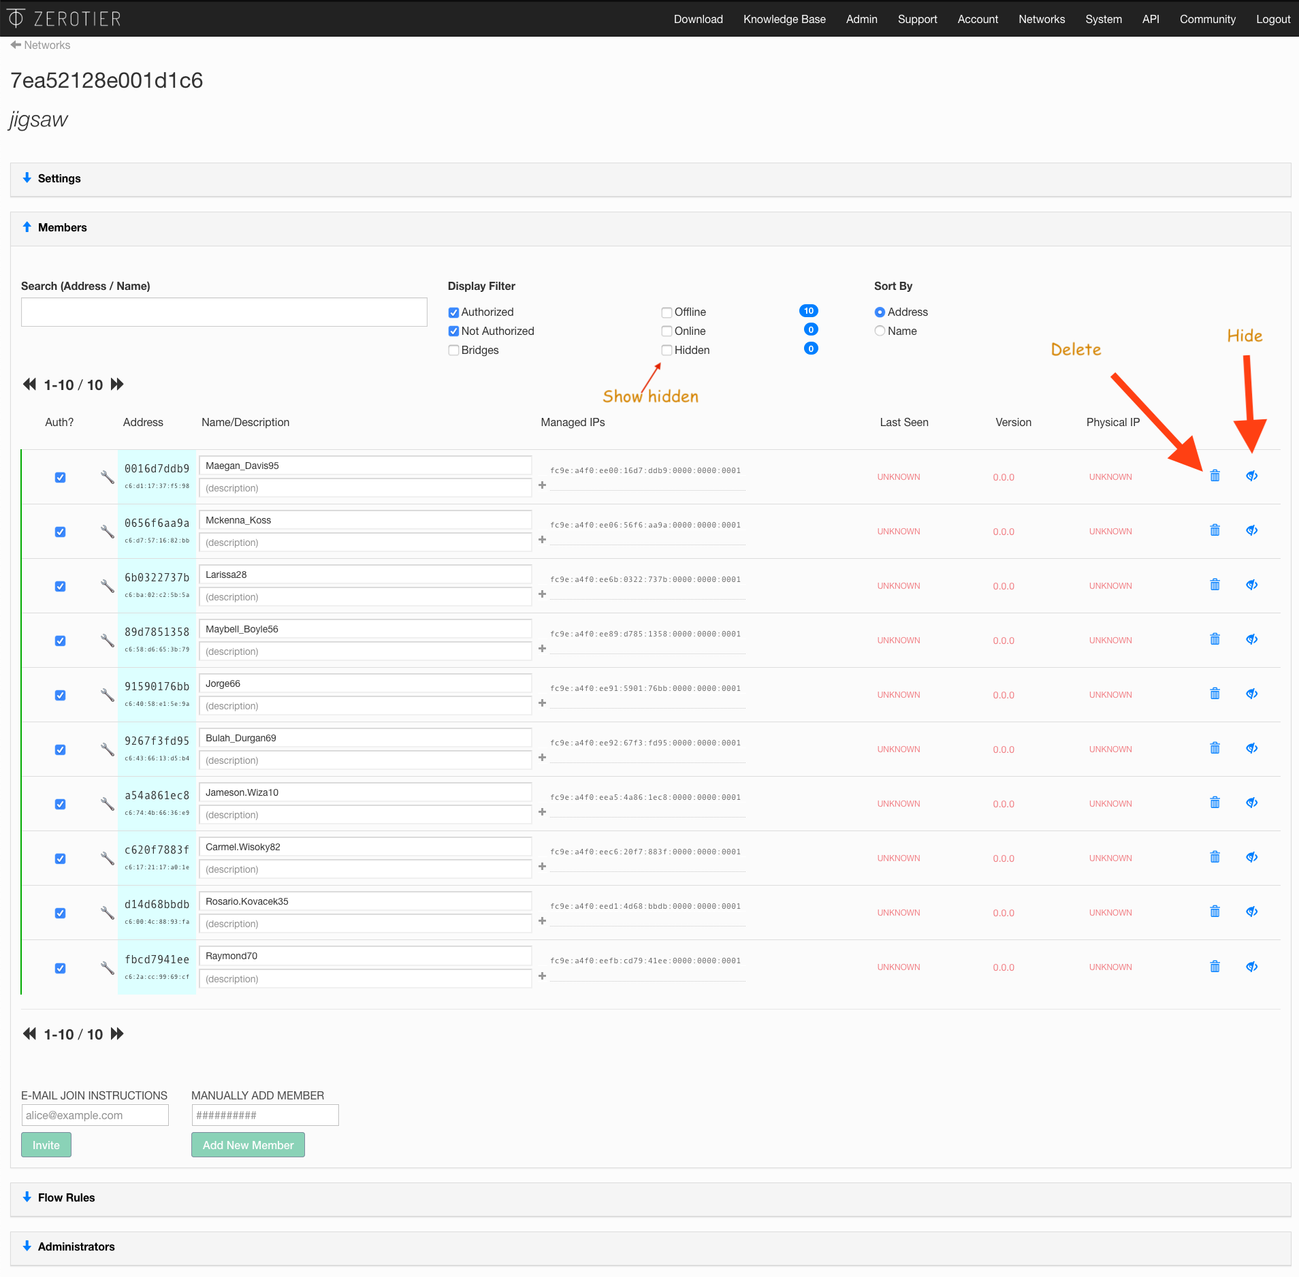
Hiding a Device:
- The device will be de-authorized and hidden from view in the list
- Hidden devices can be revealed by setting the "Hidden" checkbox above the device list
Deleting a Device:
- The device will be de-authorized and completely removed from the list
- This is more permanent than hiding
Recover a Deleted Device:
If you've deleted a device and need to recover it:
- Go to the Settings section of the network
- Find the Manually Add Member section
- Paste in the Node ID
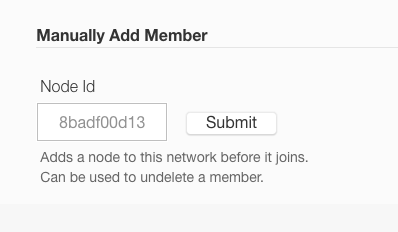
If you've lost your Node ID, it can be viewed on the device in the ZeroTier app.
Delete should only be used if the node will never join again. Just de-authorize it instead if you don't want it counted against your node limits.
If you don't see the Delete and Hide buttons, you have likely turned off your network's access control by setting it to Public. Public networks have no access control - if you deleted or de-authorized a device it would reappear within a few seconds. Set your network back to Private.
Adding Devices to a Network
- Copy your Network ID from the network page
- Install ZeroTier on your device
- Join the network using the Network ID (via UI or CLI)
- Return to Legacy Central and authorize the device in the Members section
Next Steps
- Set up DNS for your network
- Configure Flow Rules for advanced network control
- Explore Bridging to connect physical networks
- Learn about Network Routes and Subnets for advanced networking
Frequently Asked Questions
Can I make my subnet bigger or change my network's IP range?
Yes. Your network's existing devices will keep their existing IPs.
To expand your subnet:
- Create a new, larger Managed Route
- Delete the old, smaller Managed Route
- Change IPv4 Auto-Assign from Easy to Advanced
- Delete the existing range
- Add the new, bigger range
Example: If your network was on the Easy Mode 192.168.195.* (/24):
- Change the managed route to
192.168.194.0/23 - Change the auto assign range to:
192.168.194.1to192.168.195.254
To change to a completely different subnet:
If you change to a completely different, non-overlapping subnet, your network's devices will get new IPs in the new range and keep their old IPs. You will have to delete the old IPs from each device if you don't want to see them in the list.
For example, if you change from 192.168.195.* to 10.244.*.*, the devices will have IPs in both ranges, like: 192.168.195.1 and 10.244.1.1
IPs don't actually get applied on the operating system unless the network has a matching managed route.