Create a Network
A ZeroTier network behaves like a LAN you can use anywhere in the world. Devices join it over the internet, talk to each other directly, and keep working when you move them to a different physical network.
This guide gets two devices connected in about five minutes. Any devices that run ZeroTier will do — laptops, phones, servers, virtual machines.
ZeroTier Central is available in two versions. Please follow the appropriate instructions based on which version you are using:
- New Central - The modern interface with enhanced features and improved user experience (central.zerotier.com)
- Legacy Central - The original interface (my.zerotier.com)
Not sure which version you're using? See How to Check Your Central Version.
- New Central
- Legacy Central
1. Create your organization
-
Visit central.zerotier.com and log in
-
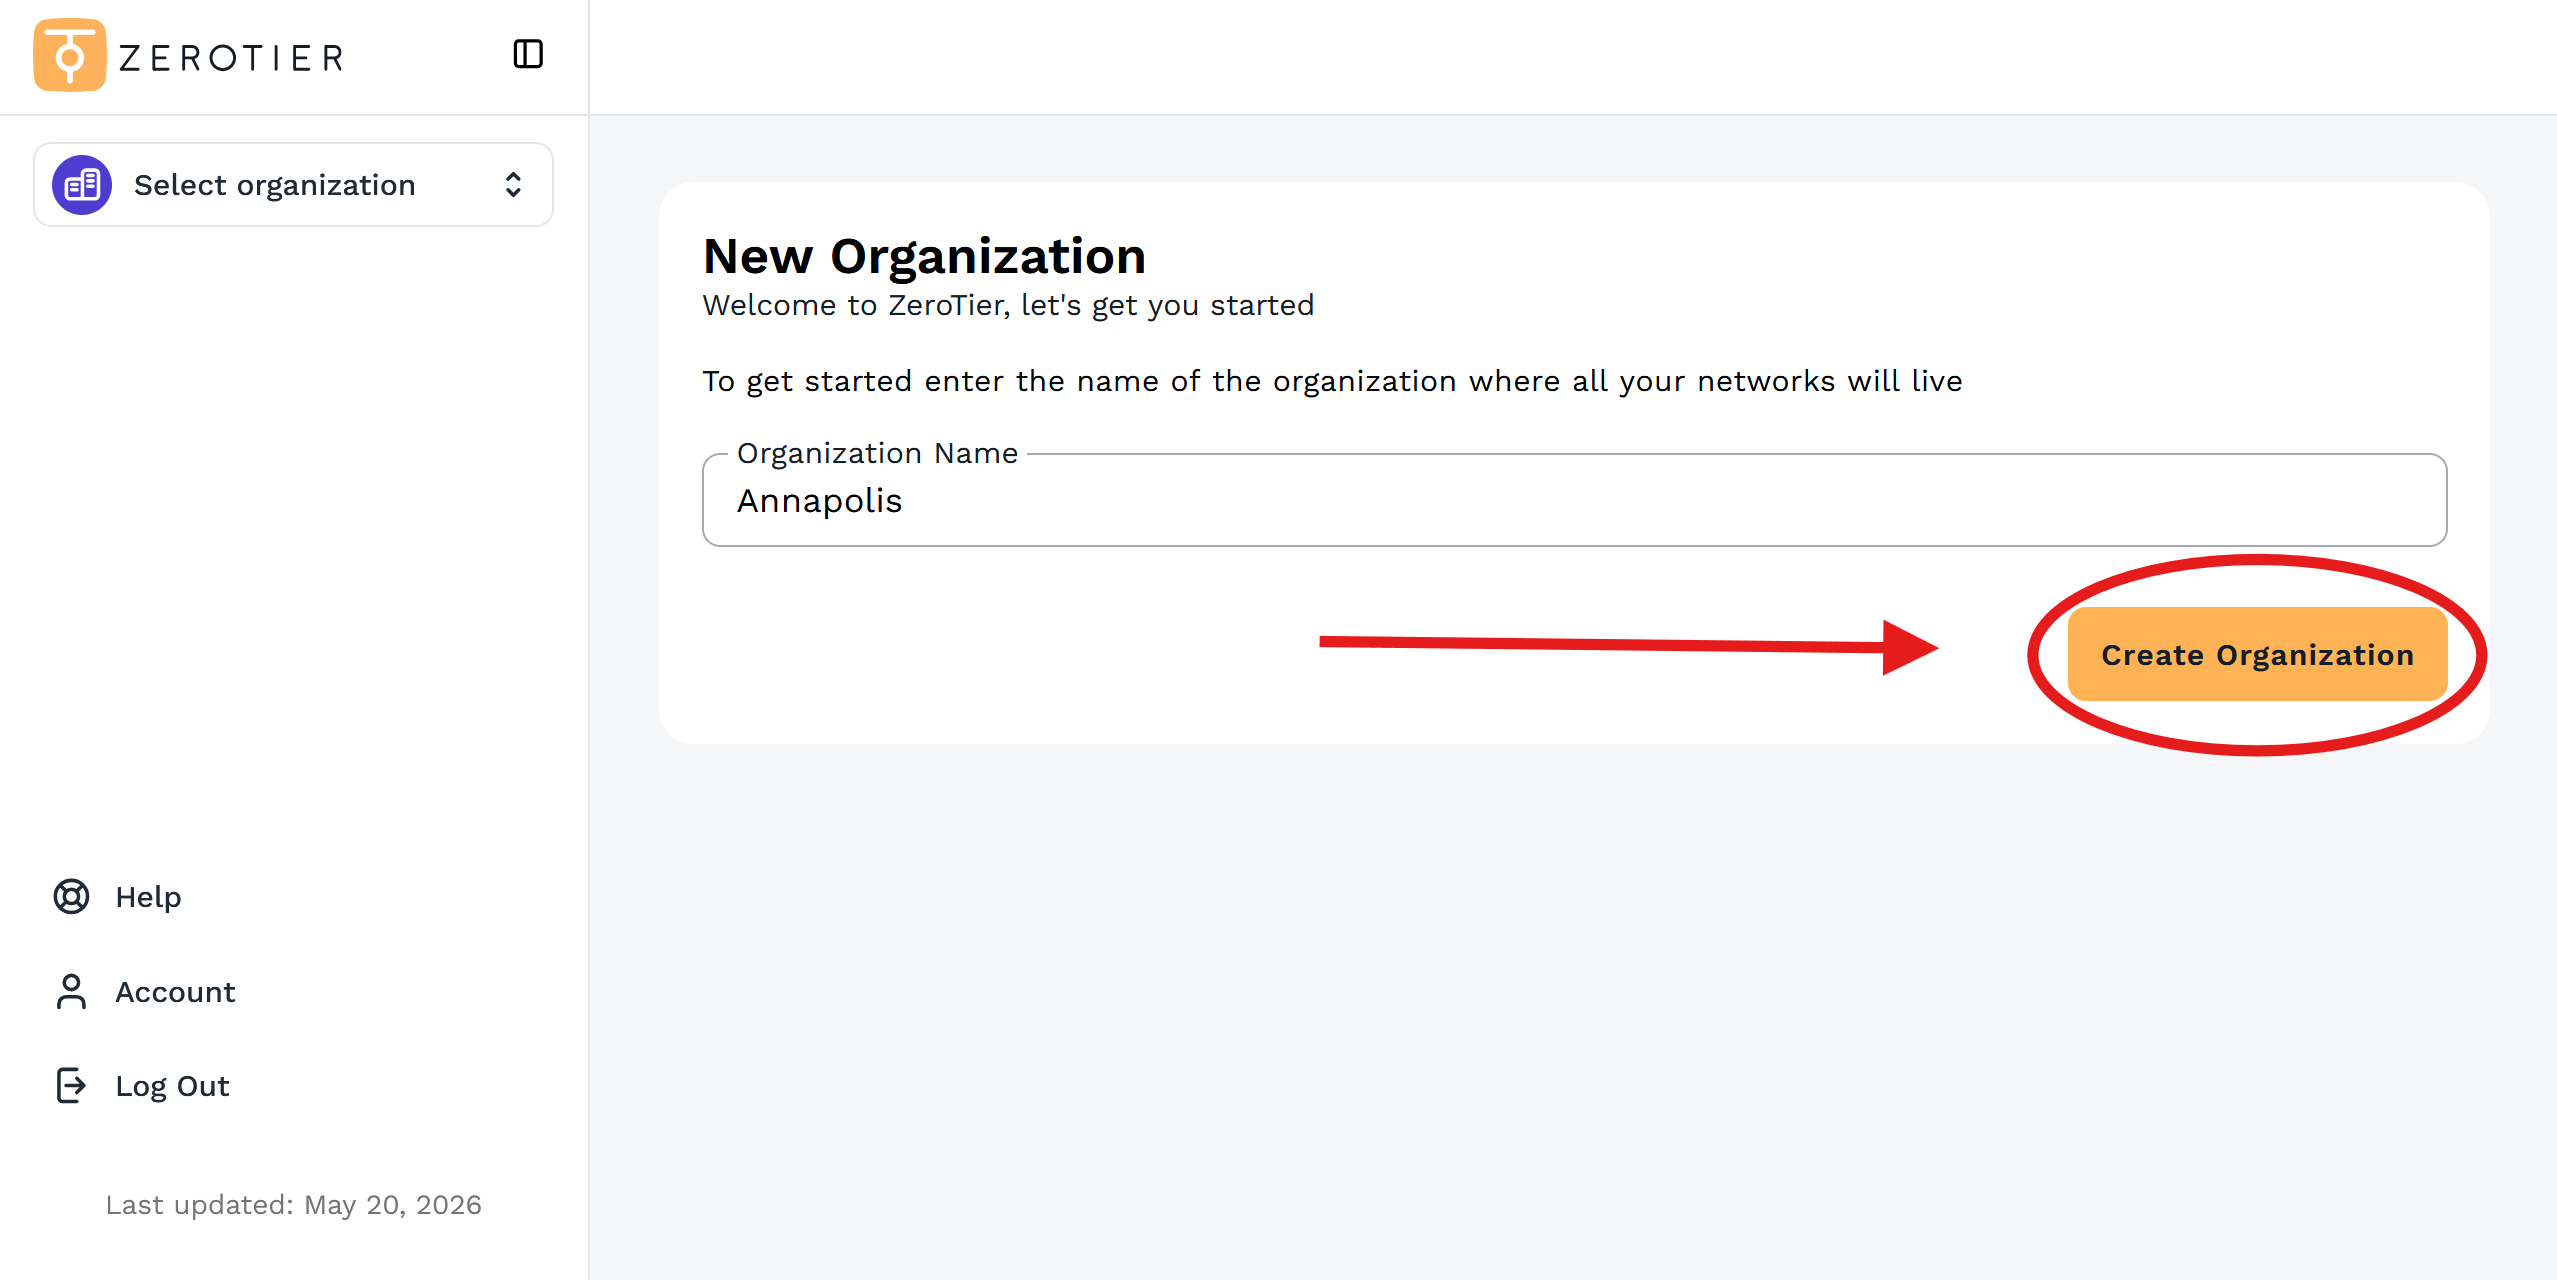
Enter an organization name and click Create Organization
-
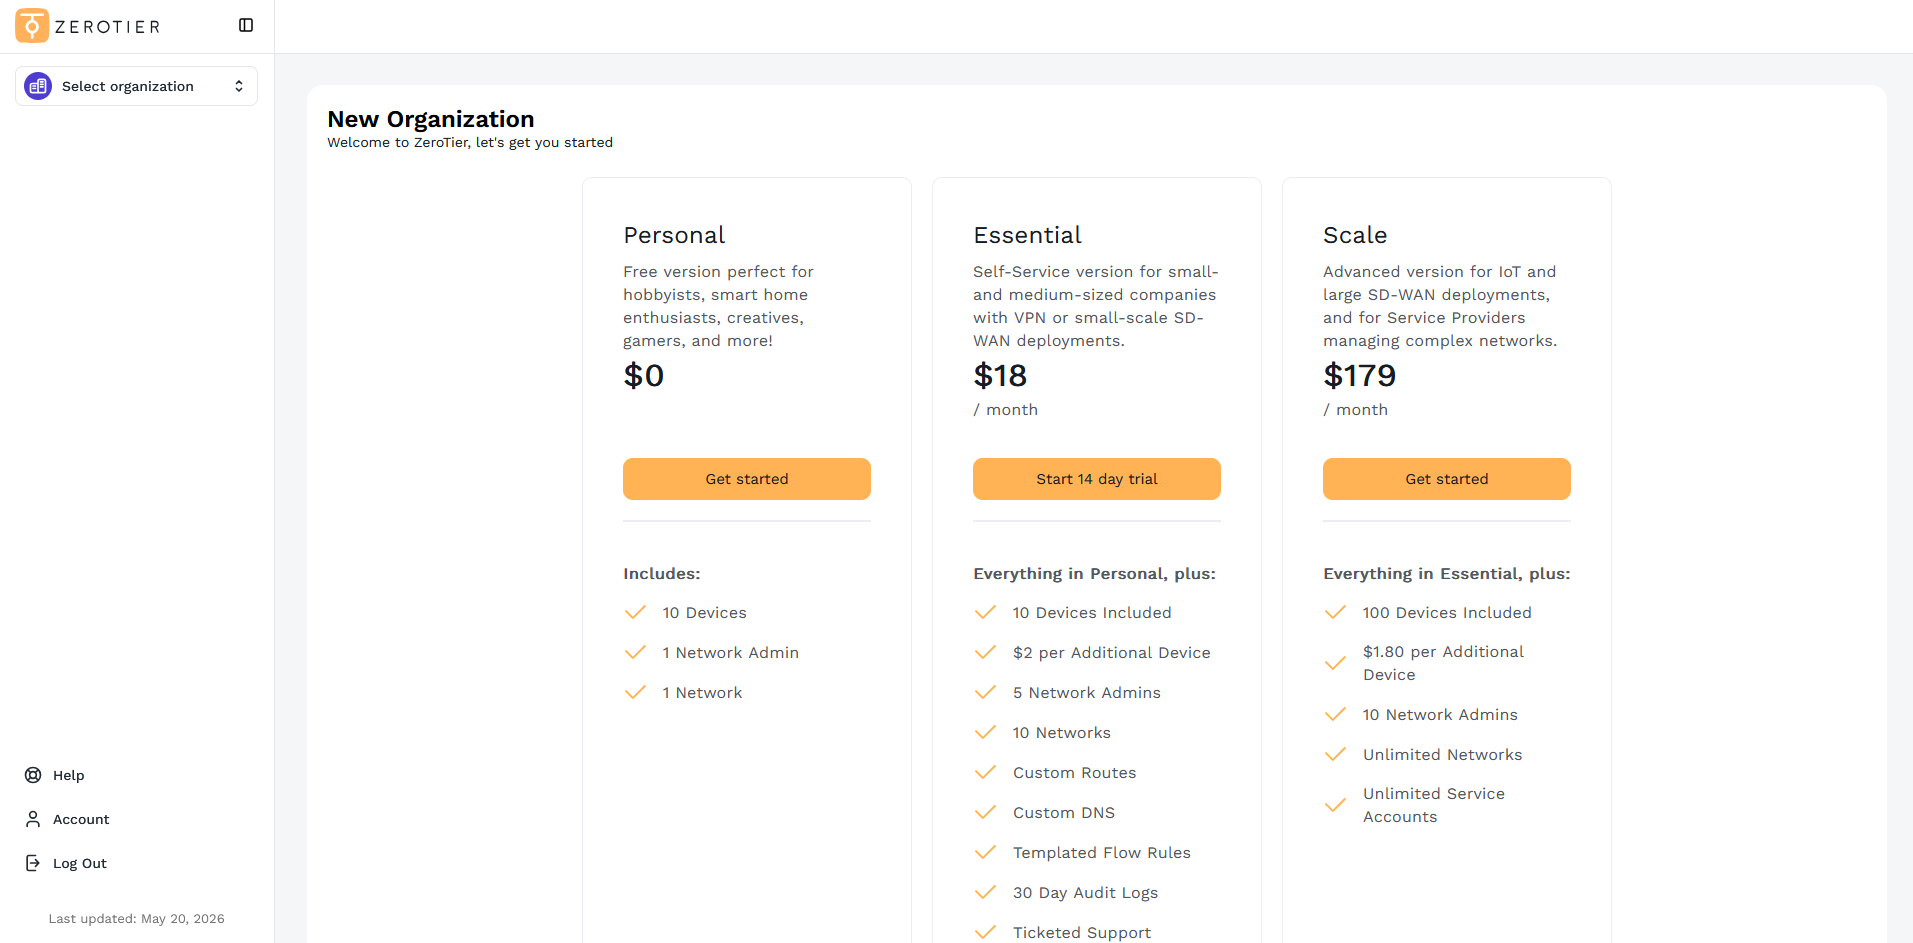
Choose a plan — your organization comes with one Network Group and one Network by default
2. Get your network ID
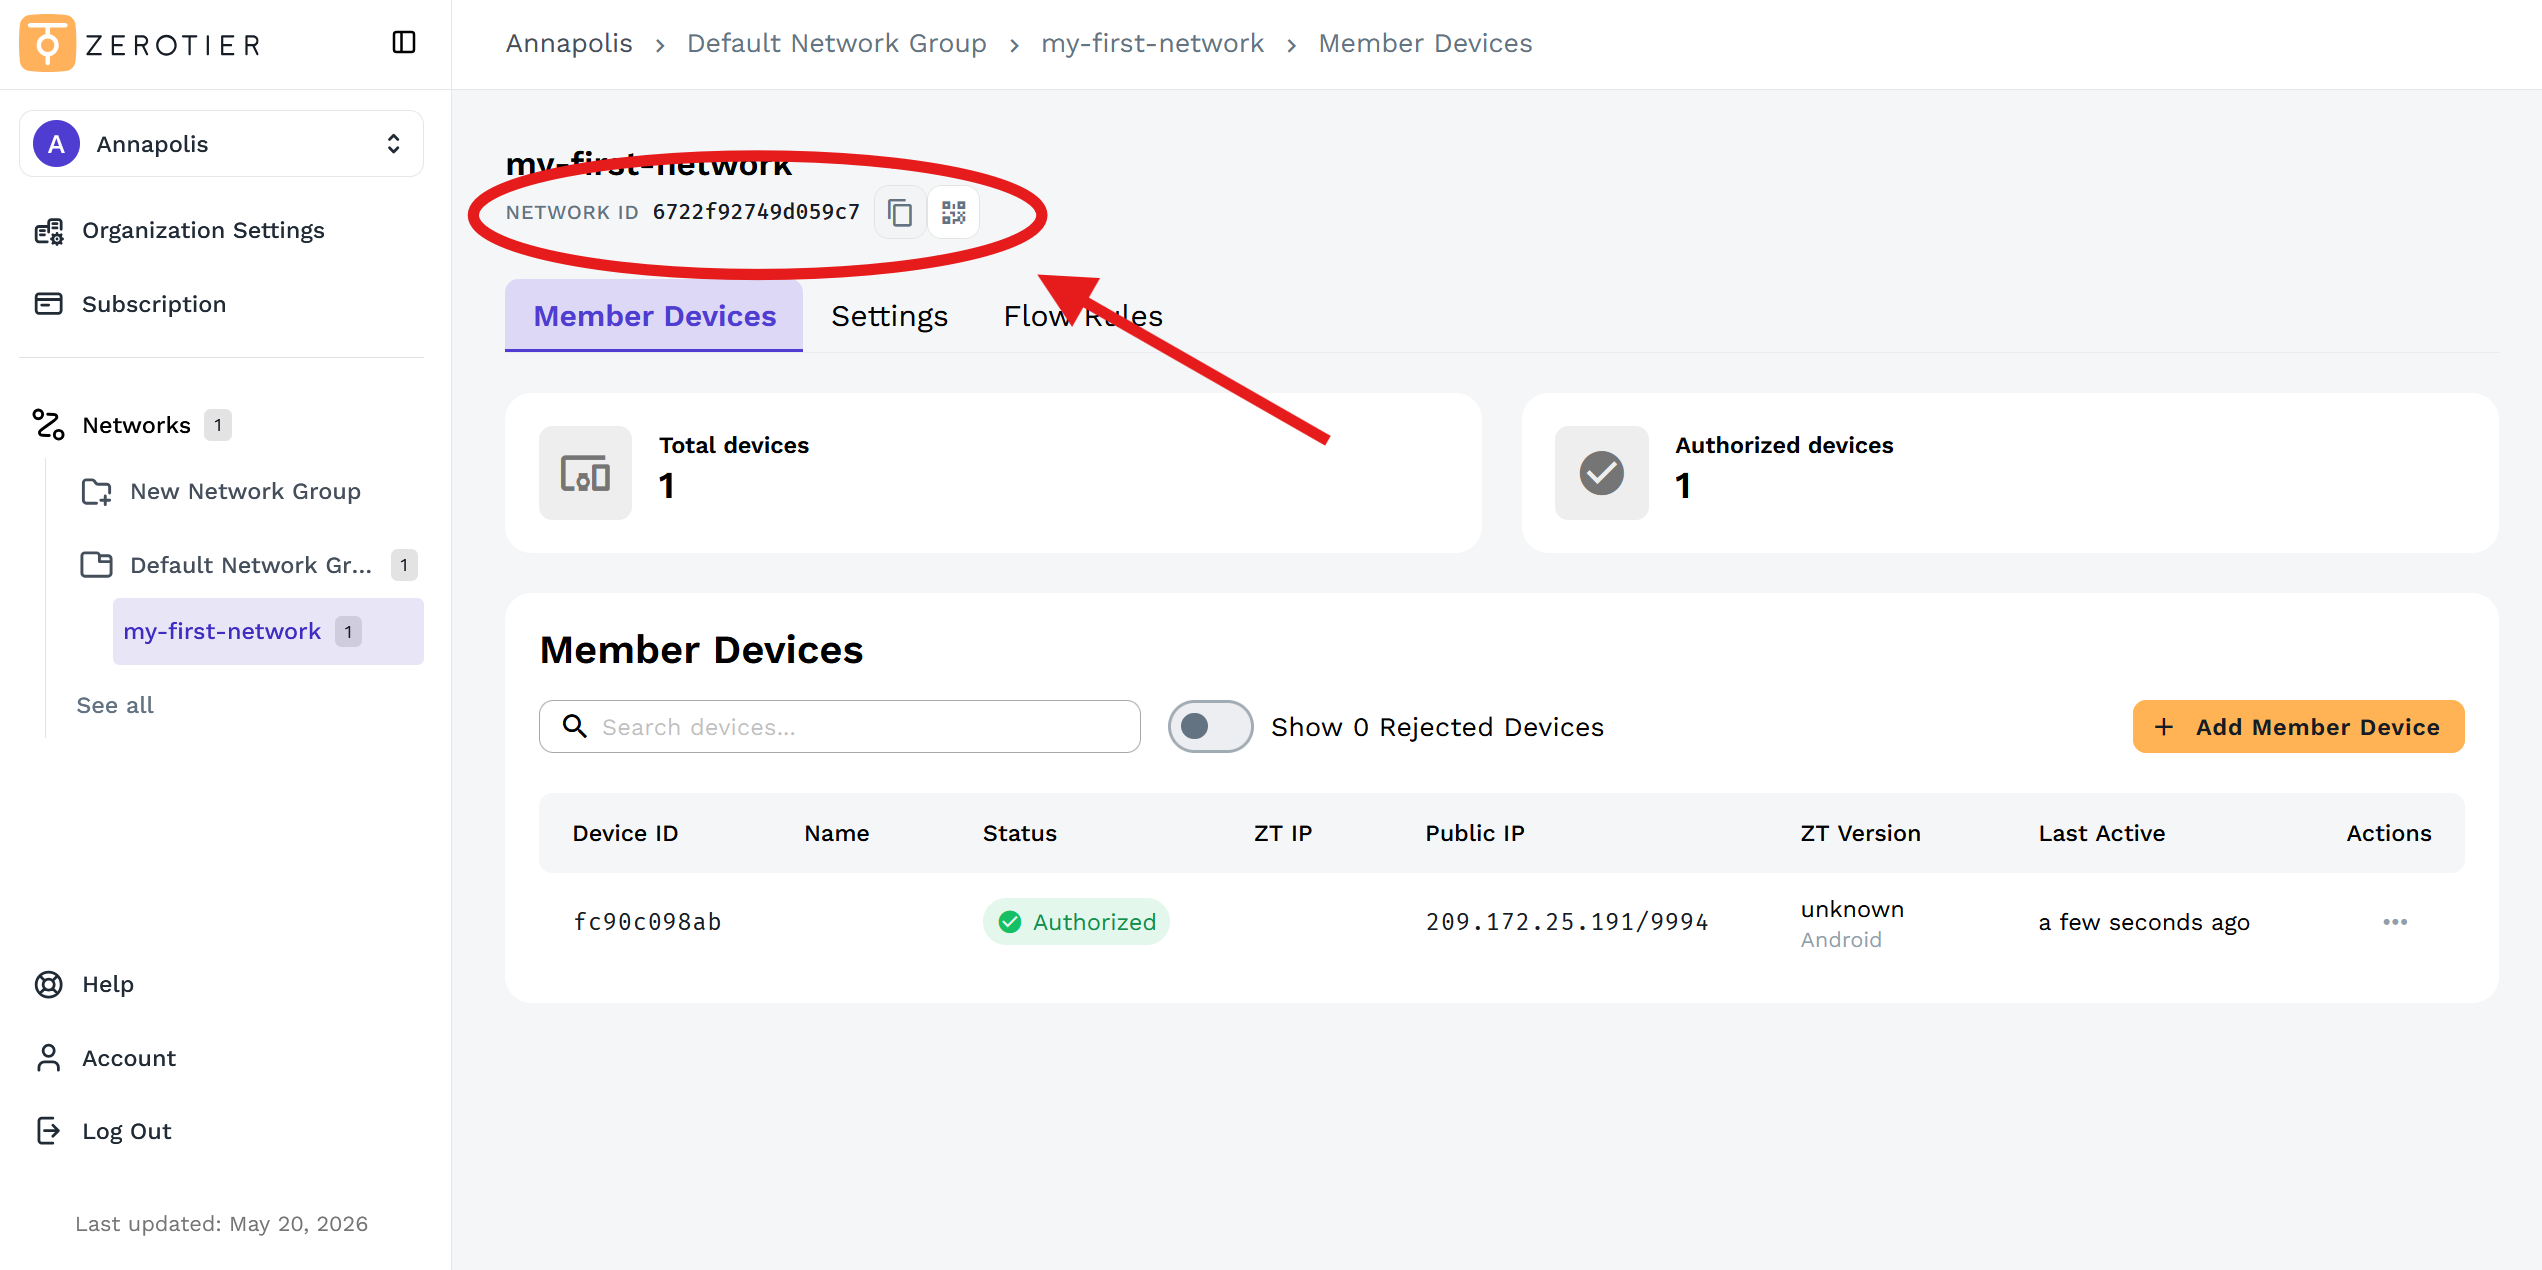
- In the left sidebar, expand Networks and click your default network (e.g. my-first-network)
- Copy the Network ID from the top of the page — 16 characters, like
6722f92749d059c7
Keep this tab open for step 4.
3. Install ZeroTier and join
Download ZeroTier from zerotier.com/download and install it on each device.
ZeroTier supports the current major release and two major releases prior. Currently supported: v1.16.x, v1.14.x and v1.12.x.
Desktop — click the ZeroTier icon in your menu bar (macOS) or system tray (Windows), choose Join New Network..., paste the Network ID and click Join.
Terminal — works on any platform with the CLI installed:
sudo zerotier-cli join 6722f92749d059c7
Check it registered:
sudo zerotier-cli listnetworks
Until you authorize the device in step 4 it will show ACCESS_DENIED, which is expected:
200 listnetworks 6722f92749d059c7 my-first-network ee:5a:5e:d1:9c:b8 ACCESS_DENIED PRIVATE zt3jn2z57r
4. Authorize your devices
A device that joins is not connected until you authorize it.
- In the Member Devices tab, find the device showing "Not Authorized"
- Click the three-dot menu under Actions and select Authorize
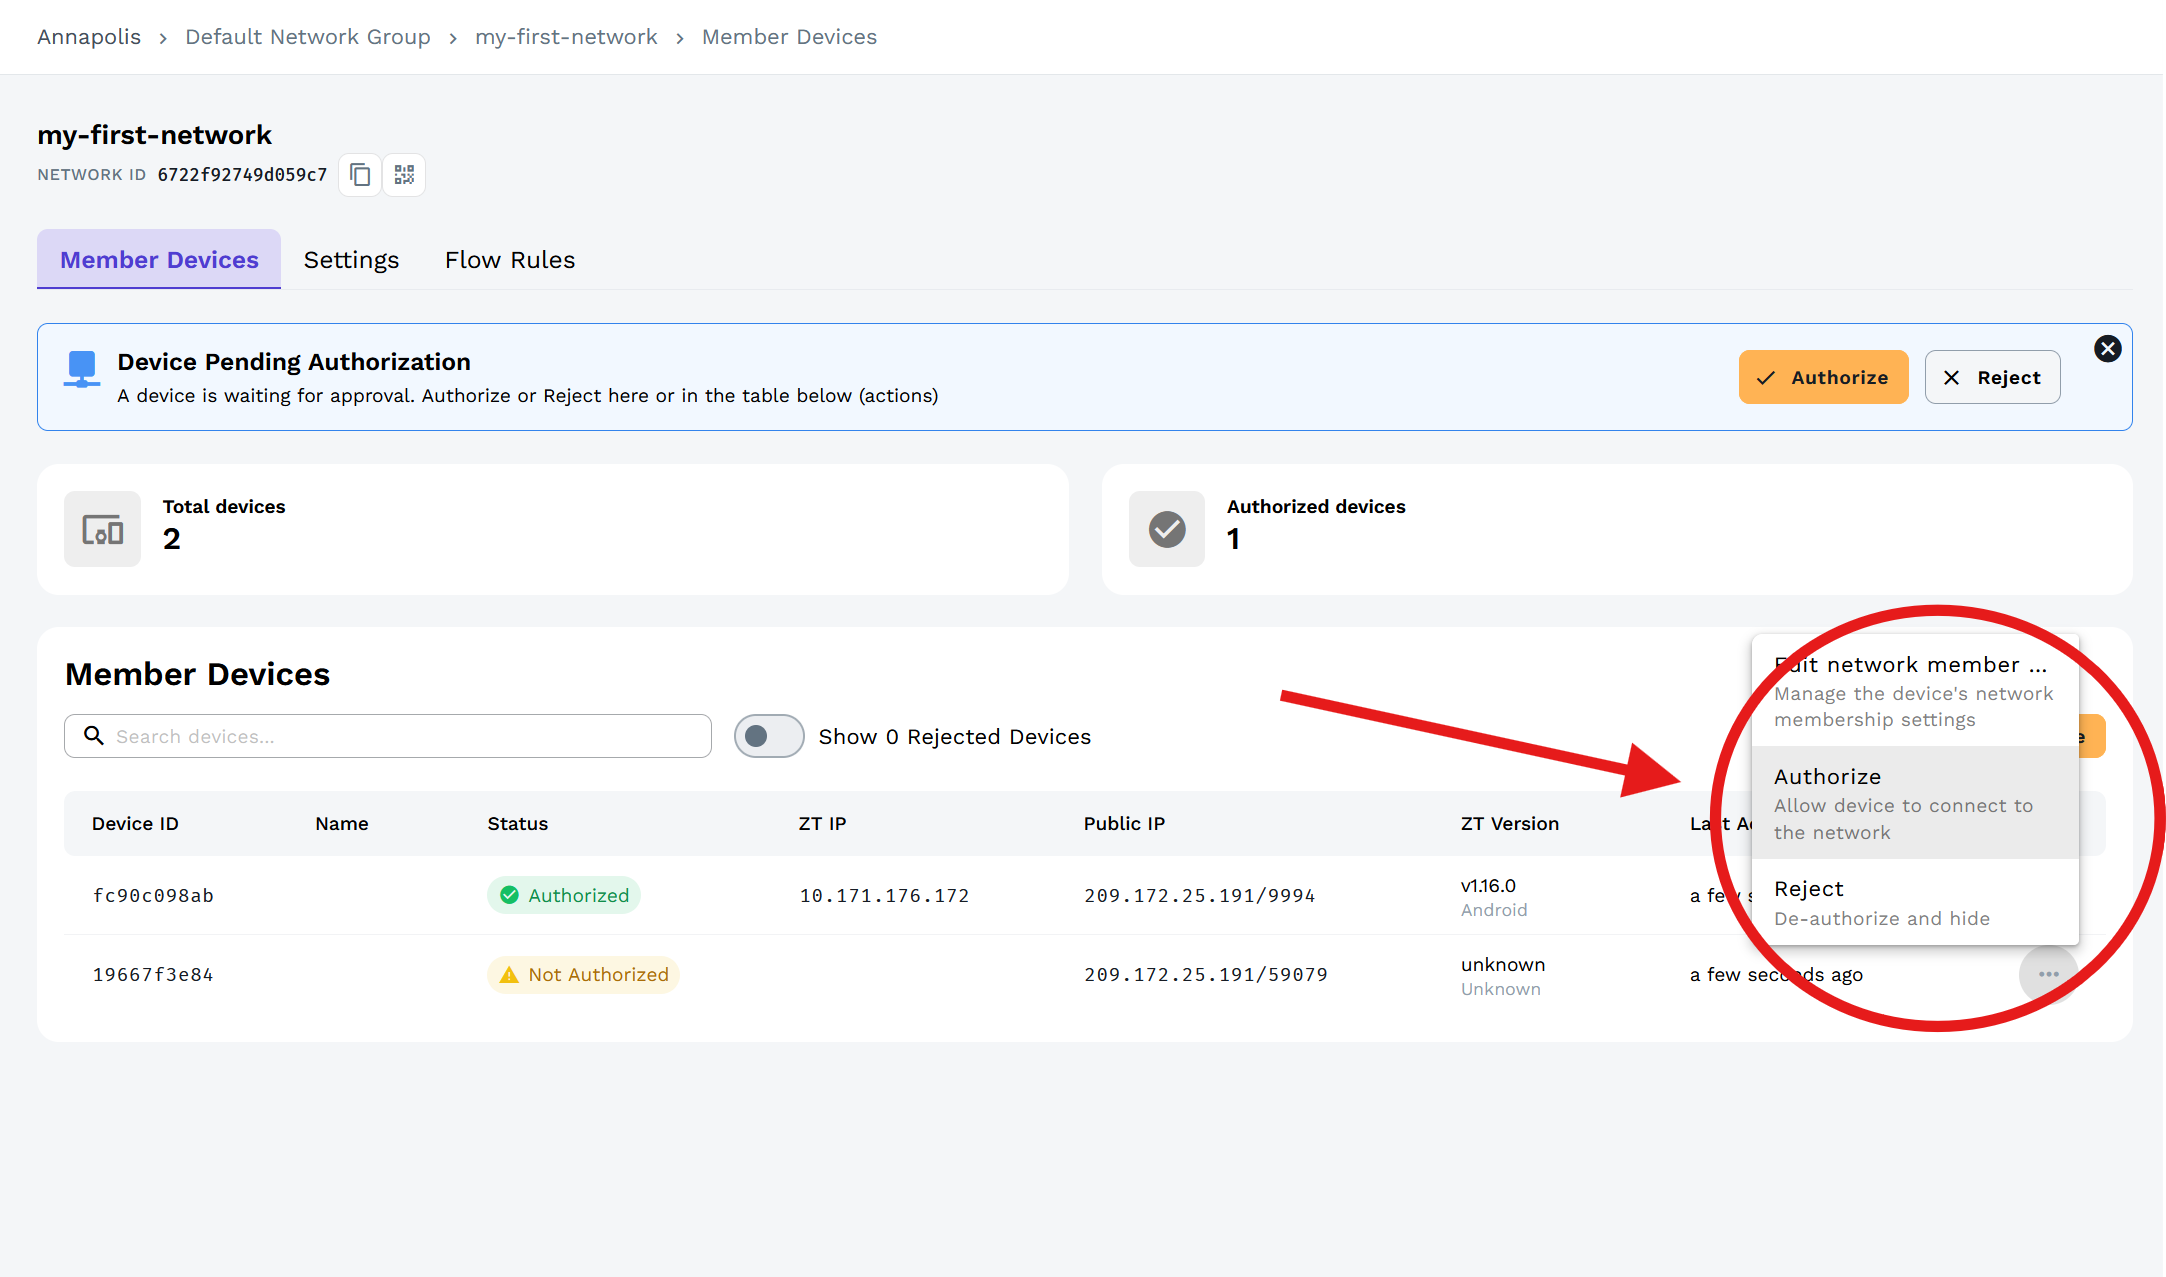
You can also click Authorize in the notification banner that appears when a device joins, though managing devices directly avoids authorizing something by accident.
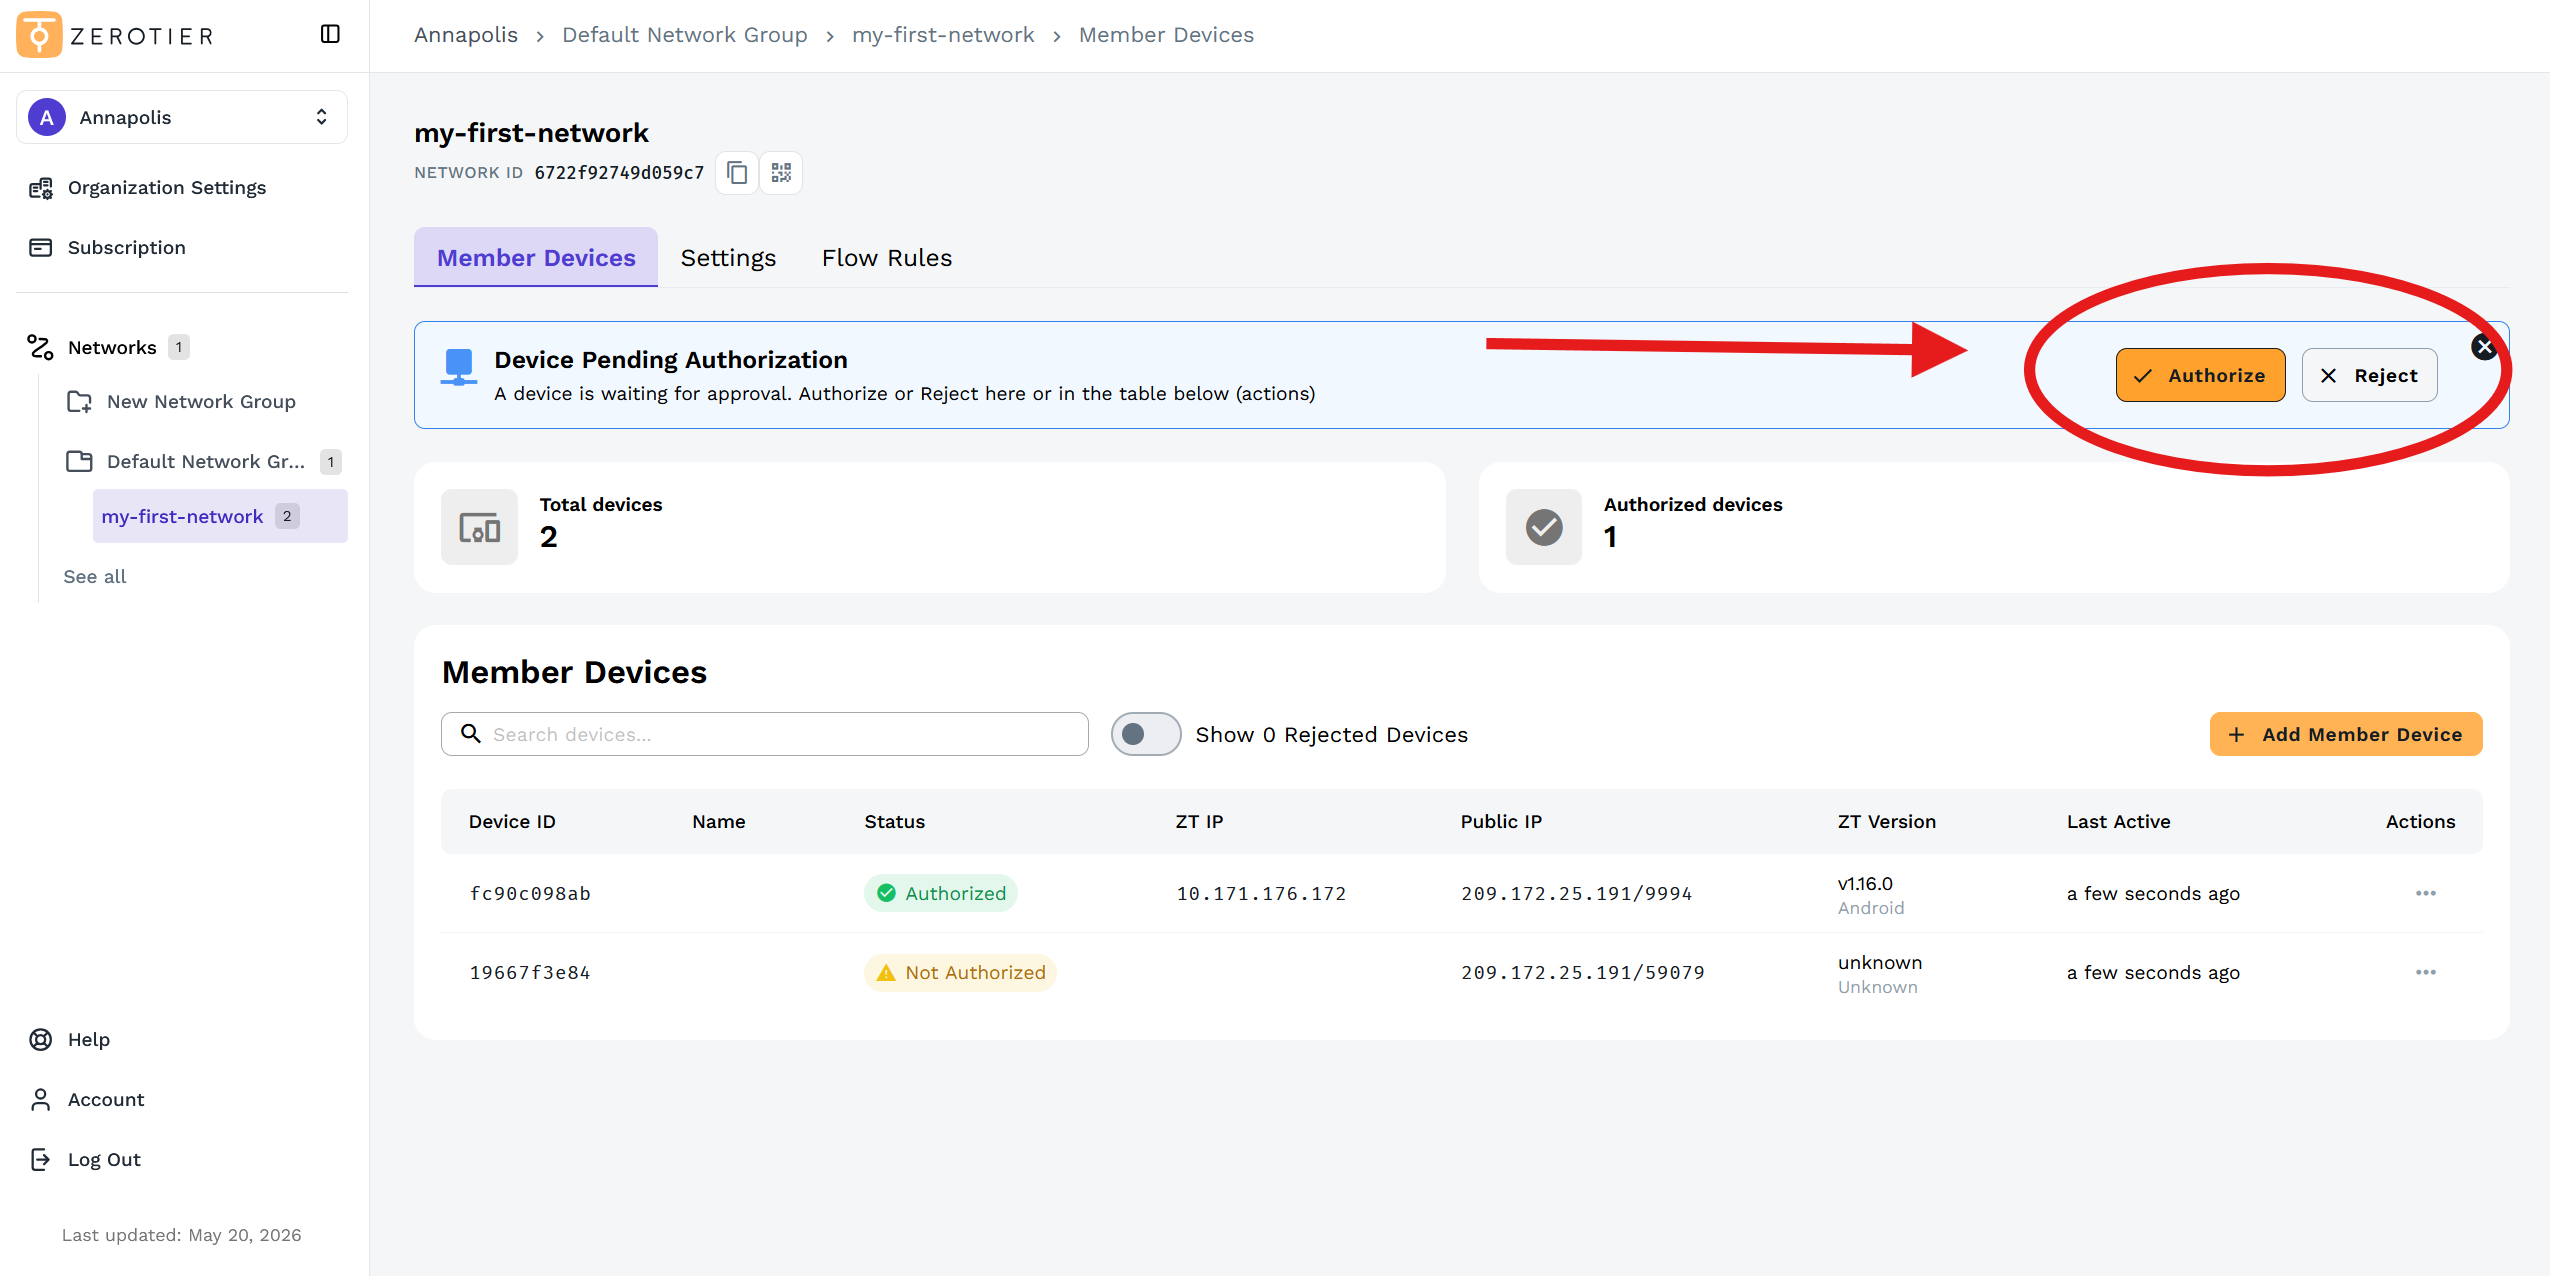
If a newly joined device isn't listed, refresh the page.
5. Test your connection
Note the ZT IP addresses under Member Devices — they look like 10.171.176.172.
Repeat steps 3 and 4 on a second device, then ping one from the other. See Testing from the command line below.
1. Create your network
- Visit my.zerotier.com and log in
- Click Create A Network
- Copy the Network ID from the network list — 16 characters, like
d5e04297a16fa690
Keep this tab open for step 3.
2. Install ZeroTier and join
Download ZeroTier from zerotier.com/download and install it on each device.
Desktop — click the ZeroTier icon in your menu bar (macOS) or system tray (Windows), choose Join New Network..., paste the Network ID and click Join.
Terminal — works on any platform with the CLI installed:
sudo zerotier-cli join d5e04297a16fa690
Check it registered:
sudo zerotier-cli listnetworks
Until you authorize the device in step 3 it will show ACCESS_DENIED, which is expected:
200 listnetworks d5e04297a16fa690 my-network ee:5a:5e:d1:9c:b8 ACCESS_DENIED PRIVATE zt3jn2z57r
3. Authorize your devices
- Return to my.zerotier.com and click your network
- Scroll to the Members section
- Tick the Auth? checkbox beside each device
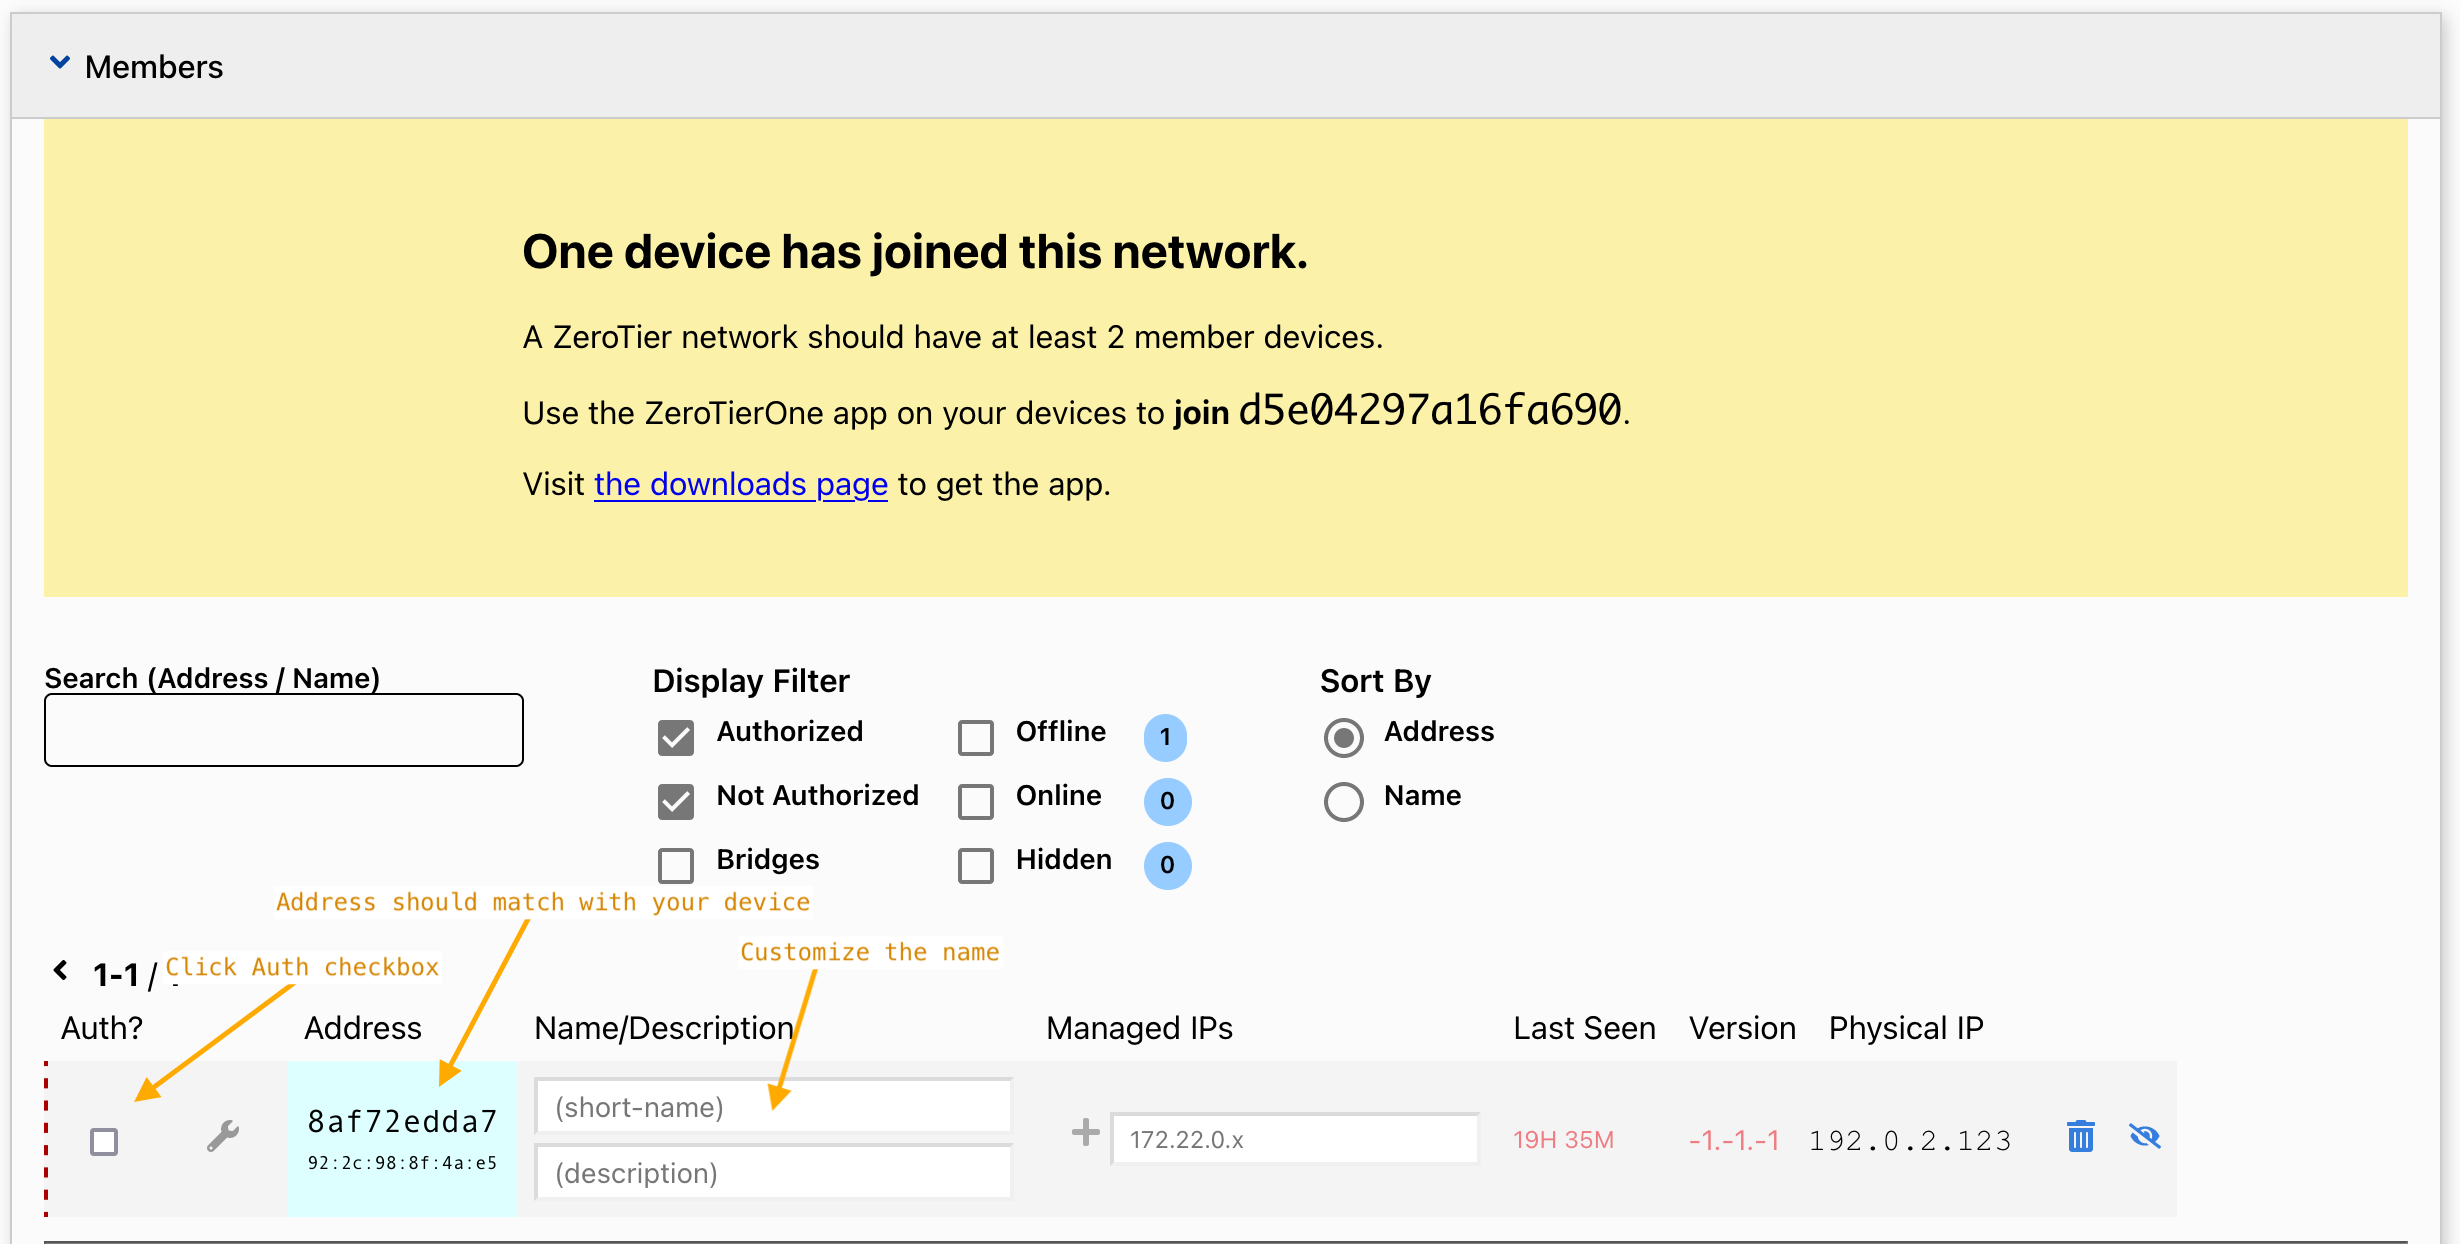
Green checkboxes appear under Auth*.*
4. Test your connection
Note the Managed IP addresses in the Members section — they look like 192.168.191.242.
Repeat steps 2 and 3 on a second device, then ping one from the other. See Testing from the command line below.
Testing from the command line
ping ships with every operating system and is the quickest way to prove the network works.
- macOS
- Windows
- Linux
- Mobile
Open Terminal with Spotlight (cmd-space), then send five packets to the other device's ZeroTier IP:
ping -c 5 10.147.17.101
Search for "powershell" and open it. On Windows the count flag is -n, not -c:
ping -n 5 10.147.17.101
Open your terminal emulator, then:
ping -c 5 10.147.17.101
Mobile operating systems have no command line. Ping the phone from your computer instead, or install a ping app.
Try switching the phone between wifi and cellular — it can take about a minute, but ZeroTier should keep the connection alive.
A successful ping looks like this:
PING 10.147.17.101 (10.147.17.101): 56 data bytes
64 bytes from 10.147.17.101: icmp_seq=0 ttl=64 time=15.2 ms
64 bytes from 10.147.17.101: icmp_seq=1 ttl=64 time=12.1 ms
64 bytes from 10.147.17.101: icmp_seq=2 ttl=64 time=11.8 ms
Ping the other device, not the address of the machine you are typing on.
Request timeout or 100% packet loss usually means one of:
- The IP address has a typo — check it against the members list
- The device is not authorized yet
- You are pinging your own address
Still stuck? See FAQ & Troubleshooting or contact support.
Windows and ping
Windows Firewall blocks inbound ICMP by default, but ZeroTier enables it for its own interface automatically, so this normally needs no action. To enable it by hand: open Windows Firewall, click Advanced Settings, then Inbound Rules, find File and Printer Sharing (Echo Request - ICMPv4-In), right-click and choose Enable Rule. Microsoft documents this here.
Join multiple networks
One device can belong to many networks at once — a home network, a work network, a friends network. They do not all have to be networks you created.
Make sure the networks do not use overlapping subnets.
Leaving a network
- Click the ZeroTier icon in your menu bar or system tray
- Click the network name to uncheck it, or use Network Details to uncheck Connected
- To remove it permanently, use Network Details -> Delete Network
Or from the CLI:
sudo zerotier-cli leave NETWORK_ID
What to do next
- Windows Remote Desktop or SSH
- A private gaming LAN
- Reach the web interfaces of your home lab
- Share files across your devices
- Route all traffic through a VPN exit node
- Route to a physical network or a Docker network
- Add DNS to your network
Next steps
- New Central Overview — full guide to New Central's features
- Organizations and User Management
- Network Groups and Networks
- Host a website across your network
- The ZeroTier Protocol — how it all works